How to Add a DKIM Record in Namecheap: Complete Setup Guide

Quick Answer
Adding a DKIM record in Namecheap involves entering the TXT or CNAME details provided by your email service in Advanced DNS settings. Save the record, allow DNS updates, and verify it with a DKIM lookup tool.lookup tool.
Try Our Free DKIM Lookup
Auto-discover DKIM selectors for any domain - scan 185 common selectors across all major providers.
Discover DKIM Selectors →DomainKeys Identified Mail (DKIM) is an email authentication mechanism that allows receiving mail servers to verify that an email was authorized by the sending domain and that important parts of the message have not been altered while in transit.
To enable DKIM for your domain, you need to publish the appropriate DKIM information in your domain’s DNS. If your DNS is managed through Namecheap, you can add the required DKIM record directly from its DNS management interface.
This guide explains how to prepare a DKIM record and publish it in Namecheap step by step.
What Is a DKIM Record?
A DKIM record contains the public information that receiving mail servers use to validate DKIM signatures attached to outgoing messages.
When an email is sent, the sending mail system signs the message with a private DKIM key. The corresponding public key is published in DNS. The recipient’s mail server uses the DKIM selector included in the email’s signature to locate the correct DNS record.
A DKIM record is normally published beneath a hostname similar to:
selector._domainkey.example.comHere, selector identifies the DKIM key, while example.com represents your domain.
Depending on your email provider, DKIM may be published as either a TXT record or a CNAME record.
Prepare Your DKIM Record Before Using Namecheap
Before changing your DNS settings, obtain the DKIM information from the email service that sends messages on behalf of your domain.
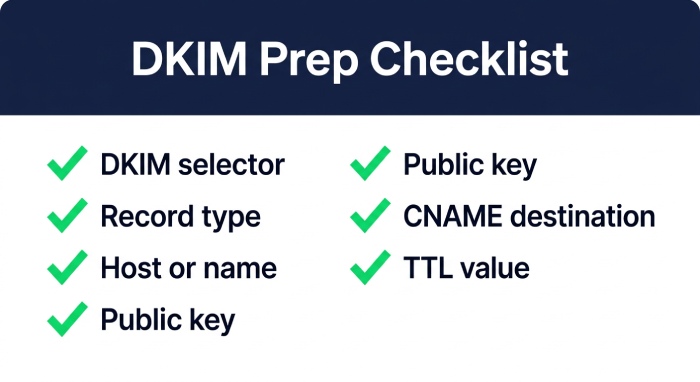
Your provider may give you information such as:
- DKIM selector
- Record type
- Host or name
- Public key
- CNAME destination
- TTL value
 The exact values depend on your email platform, so do not substitute your own values unless your provider specifically instructs you to do so.
For example, a service using a TXT-based DKIM configuration might provide information resembling:
Type: TXT
Host: selector._domainkey
Value: v=DKIM1; k=rsa; p=PUBLIC_KEY
A CNAME-based setup may instead look similar to:
Type: CNAME
Host: selector._domainkey
Target: selector-provider.example.net
Use the values supplied by your email service.
How to Add a DKIM Record in Namecheap
Once your DKIM details are ready, you can add the record through Namecheap’s DNS management area.
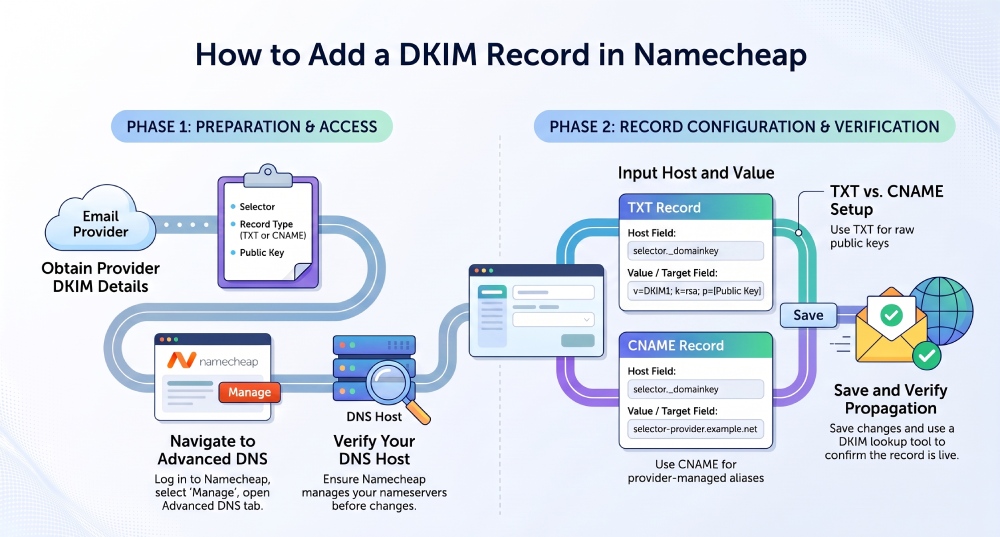
1. Sign In to Your Namecheap Account
Open Namecheap and sign in to the account that manages your domain.
After logging in, you should arrive at your account dashboard.
2. Open Your Domain List
From the dashboard, go to the Domain List.
Locate the domain for which you want to configure DKIM. Select Manage beside that domain to access its management settings.
Make sure you select the correct domain before modifying its DNS records.
3. Open Advanced DNS
Within the domain management page, locate the Advanced DNS section.
This area contains the DNS records currently associated with your domain and provides the controls needed to add, edit, or remove records.
Scroll through the DNS records until you find the option to create a new record.
4. Add a New DKIM Record
Select Add New Record.
Namecheap will display fields for choosing the record type and entering the necessary DNS information.
The values you enter depend on whether your email provider uses a TXT or CNAME record.
5. Add the DKIM TXT Record in Namecheap
If your email provider has supplied a TXT-based DKIM record, select TXT Record as the record type in Namecheap.
Enter the DKIM selector followed by ._domainkey in the Host field.
For example:
s1._domainkeyIn this example, s1 is the DKIM selector. Your email provider may use a different selector.
Next, enter the complete DKIM public key provided by your email service in the Value field.
A simplified example would be:
Type: TXT
Host: s1._domainkey
Value: v=DKIM1; k=rsa; p=PUBLIC_KEY
Do not use the example public key as an actual DKIM value. Always copy the DKIM record details provided by your email service.
6. Configure a TXT-Based DKIM Record
Some email platforms provide the public DKIM key as a TXT record instead.
In that situation, select TXT Record from the record-type options.
Enter the selector followed by ._domainkey in the host field.
For example:
s1._domainkeyThen place the complete DKIM public key supplied by your email provider into the value field.
A typical DKIM value begins with information similar to:
v=DKIM1; k=rsa; p=The p= portion contains the public key.
Your actual record may contain additional parameters, so copy the complete value provided by your email service.
7. Save the DNS Changes
After entering the DKIM information, review each field carefully.
Check that:
- The record type matches your provider’s instructions.
- The selector is correct.
_domainkeyis included where required.- The CNAME destination or TXT value has been copied accurately.
- You have not accidentally modified another DNS record.
Once everything looks correct, save the new record.
The DKIM record is now configured in Namecheap’s DNS.
How to Verify the DKIM Record
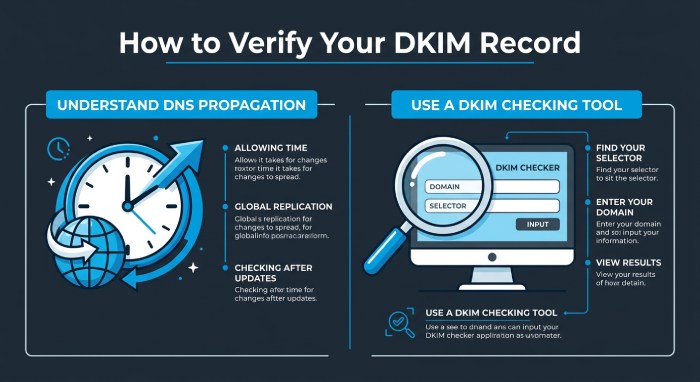 Adding the record to Namecheap does not necessarily mean it will become immediately visible everywhere.
DNS information may require some time to propagate. If a DKIM lookup does not return the record immediately, wait and check again later.
To verify the setup, perform a DKIM lookup using a DKIM checking tool. Enter:
- Your domain name
- The DKIM selector
The checker should locate the corresponding DKIM record and display the published information.
For example, if your domain is:
example.com
and your selector is:
s1
the DKIM hostname being checked would be:
s1._domainkey.example.comIf the record is found and its contents match the information supplied by your email provider, the DNS portion of your DKIM configuration is in place.
What If the DKIM Record Cannot Be Found?
If your newly created record does not appear during a lookup, check the following items:
- Confirm the DNS Provider: Make sure Namecheap is actually hosting the DNS records for your domain. If your domain uses another DNS provider or custom nameservers, changes made inside Namecheap’s DNS interface may not control the active DNS zone.
- Check the Selector: A DKIM lookup requires the correct selector. If your email provider gave you
s1, for example, searching for another selector will not locate the intended record. - Review the Hostname: Check that the hostname was entered correctly and that
_domainkeyappears in the appropriate location. - Recheck the Record Type: A CNAME record should not be entered as a TXT record, and a TXT-based DKIM key should not be replaced with a CNAME unless your email provider specifically supports that configuration.
- Allow Time for DNS Updates: DNS changes can take time to become visible across different DNS resolvers. If the record was added recently, wait before concluding that the configuration failed.
Common Namecheap DKIM Configuration Mistakes
A few simple errors can prevent DKIM from working correctly.
Using the Wrong Selector
The selector must match the selector used by your email-sending system. A mismatch means the receiving server may look for a different DNS record.
Copying Only Part of a DKIM Key
When using a TXT record, make sure the complete public key and associated DKIM parameters are entered.
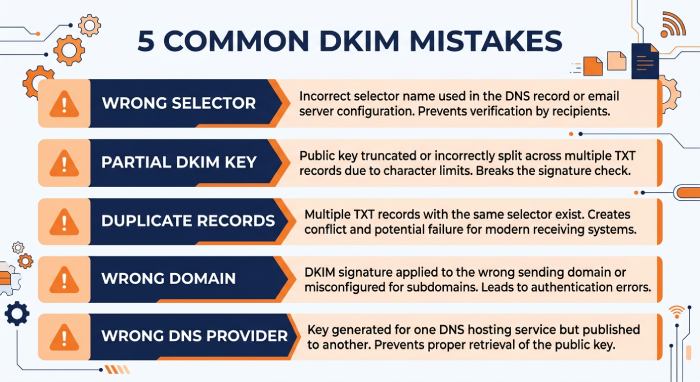
Creating Duplicate or Conflicting Records
Avoid creating multiple records at the exact same DKIM hostname unless your email provider explicitly instructs you to do so.
Editing the Wrong Domain
If you manage several domains through Namecheap, verify the domain name before making DNS changes.
Adding DNS Records in the Wrong Provider
Your domain registrar and DNS host do not always have to be the same company. If another provider manages your nameservers, DKIM should be added there instead.
Why DKIM Matters for Email Authentication
DKIM gives receiving mail systems a way to check whether a message carries a valid cryptographic signature associated with the sending domain.
It is one component of a broader email authentication strategy that can also include SPF and DMARC.
When these technologies are configured correctly, organizations can improve their ability to authenticate legitimate messages and reduce the impact of domain spoofing and unauthorized email activity.
Final Checklist
Before considering your Namecheap DKIM configuration complete, confirm that:
- Your email provider has supplied the correct DKIM details.
- You identified the correct domain in Namecheap.
- You opened the domain’s DNS management section.
- You selected the appropriate TXT or CNAME record type.
- The DKIM selector is correct.
- The hostname contains the appropriate
_domainkeycomponent. - The public key or CNAME destination was copied correctly.
- The DNS changes were saved.
- The published record can be retrieved through a DKIM lookup.
- Your email provider recognizes the DKIM configuration as valid.
Conclusion
Adding DKIM to a domain managed through Namecheap is primarily a matter of publishing the DNS record supplied by your email service. The process involves opening your domain’s Advanced DNS settings, creating the appropriate TXT or CNAME entry, entering the provider-specific values, and then verifying that the record is publicly available.
Taking a few minutes to check the selector, hostname, record type, and value can help prevent common configuration problems. Once the DNS record is visible and correctly configured, your email system can use it as part of its DKIM authentication process.
General Manager
General Manager of DuoCircle. Product strategy and commercial lead for DMARC Report's 2,000+ customer base.
LinkedIn Profile →Take control of your DMARC reports
Turn raw XML into actionable dashboards. Start free - no credit card required.