Getting started with BIMI for Zoho Mail

Quick Answer
BIMI (Brand Indicators for Message Identification) displays a brand's verified logo next to authenticated emails in supporting clients. BIMI requires a DMARC policy of `quarantine` or `reject` - `p=none` is not sufficient. Getting started with BIMI for Zoho Mail Getting started with BIMI for Zoho Mail
Related: Free DMARC Checker ·How to Create an SPF Record ·SPF Record Format
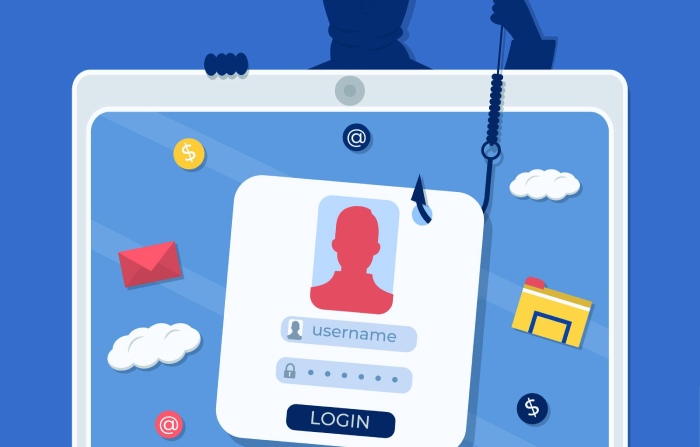

BIMI (Brand Indicators for Message Identification) displays a brand’s verified logo next to authenticated emails in supporting clients. BIMI requires a DMARC policy of quarantine or reject - p=none is not sufficient.
The most common mistake we see during DMARC setup is jumping straight to p=reject without monitoring first, says Vasile Diaconu, Operations Lead at DuoCircle. Start at p=none, analyze your reports for at least a full quarter - you need to catch monthly, quarterly, and annual email senders that only fire periodically. Then fix any legitimate senders that fail before enforcing. We walk every customer through this sequence.
DMARC Report
Getting started with BIMI for Zoho Mail
<button title="Play" aria-label="Play Episode" aria-pressed="false" class="play-btn">
Play Episode
					</button>
					<button title="Pause" aria-label="Pause Episode" aria-pressed="false" class="pause-btn hide">
Pause Episode
					</button>


					<audio preload="none" class="clip clip-18926">
						<source src="https://media.mailhop.org/dmarcreport/images/2024/12/Getting-started-with-BIMI-for-Zoho-Mail.mp3">
					</audio>


							<button class="player-btn player-btn__volume" title="Mute/Unmute">
Mute/Unmute Episode
							</button>
							<button data-skip="-10" class="player-btn player-btn__rwd" title="Rewind 10 seconds">
Rewind 10 Seconds
							</button>
							<button data-speed="1" class="player-btn player-btn__speed" title="Playback Speed" aria-label="Playback Speed">1x</button>
							<button data-skip="30" class="player-btn player-btn__fwd" title="Fast Forward 30 seconds">
Fast Forward 30 seconds
							</button>


							<time class="ssp-timer">00:00</time>
/
							<!-- We need actual duration here from the server -->
							<time class="ssp-duration" datetime="PT0H2M29S">2:29</time>


								<nav class="player-panels-nav">
												<button class="subscribe-btn" id="subscribe-btn-18926" title="Subscribe">Subscribe</button>
																		<button class="share-btn" id="share-btn-18926" title="Share">Share</button>
										</nav>
RSS Feed
							<input value="https://dmarcreport.com/feed/podcast/dmarc-report" class="input-rss input-rss-18926" title="RSS Feed URL" readonly />


						<button class="copy-rss copy-rss-18926" title="Copy RSS Feed URL" aria-label="Copy RSS Feed URL"></button>


						Share


						<a href="https://www.facebook.com/sharer/sharer.php?u=https://dmarcreport.com/blog/podcast/getting-started-with-bimi-for-zoho-mail/&t=Getting started with BIMI for Zoho Mail" target="blank" rel="noopener noreferrer" class="share-icon facebook" title="Share on Facebook">


						</a>
						<a href="https://twitter.com/intent/tweet?text=https://dmarcreport.com/blog/podcast/getting-started-with-bimi-for-zoho-mail/&url=Getting started with BIMI for Zoho Mail" target="blank" rel="noopener noreferrer" class="share-icon twitter" title="Share on Twitter">


						</a>
						<a href="https://media.mailhop.org/dmarcreport/images/2024/12/Getting-started-with-BIMI-for-Zoho-Mail.mp3" target="blank" rel="noopener noreferrer" class="share-icon download" title="Download" download>


						</a>


						Link


						<input value="https://dmarcreport.com/blog/podcast/getting-started-with-bimi-for-zoho-mail/" class="input-link input-link-18926" title="Episode URL" readonly />


					<button class="copy-link copy-link-18926" title="Copy Episode URL" aria-label="Copy Episode URL" readonly=""></button>


						Embed
/*! This file is auto-generated */ ’ title=“Embed Code” class=“input-embed input-embed-18926” readonly/>
<button class="copy-embed copy-embed-18926" title="Copy Embed Code" aria-label="Copy Embed Code"></button>
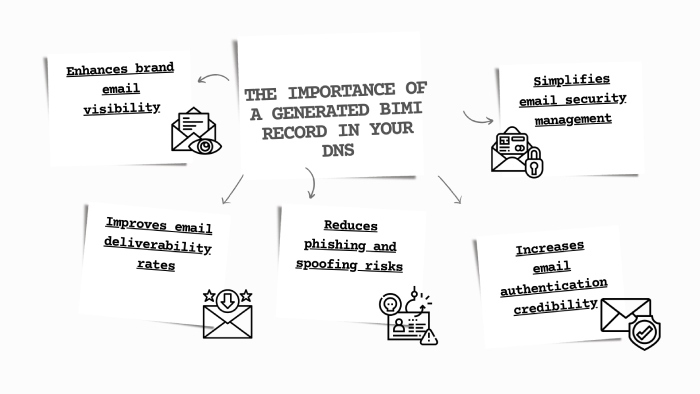
Zoho users should implement BIMI so that their logos are displayed alongside authenticated emails in recipients’ inboxes. This way, more people will trust your messages, and your domain’s reputation will improve. Moreover, a logo creates a **professional and consistent presence in emails. The visual logo reinforces that the email is sent by a legitimate source, ultimately boosting engagement and open rates.
Zoho encourages and supports BIMI and, hence, offers easy integration with DNS settings for SPF, DKIM, and DMARC.
Requirements for deploying BIMI for Zoho Mail
Here are 4 things you need to ensure to start with BIMI setup-
As of 2025, DMARC is mandatory under multiple compliance frameworks. CISA BOD 18-01 requires p=reject for US federal domains. PCI DSS v4.0 mandates DMARC for organizations processing payment card data as of March 2025. Google and Yahoo require DMARC for bulk senders (5,000+ messages/day) since February 2024, and Microsoft began rejecting non-compliant email in May 2025. The UK NCSC, Australia’s ASD, and Canada’s CCCS all mandate DMARC for government domains. Cyber insurers increasingly require DMARC enforcement as an underwriting condition.
1. Properly configured SPF for your domain
Ensure your SPF record doesn’t have the following configurations that could make it overly permissive-
-
Use of +all mechanism
-
Use of wide IP ranges
-
Not specifying the ‘all’ mechanism
-
Excessive wildcarding - Mixing too many mechanisms
-
Not removing deprecated or unused entries
-
Overusing the ‘**include’ mechanism Run your SPF record through an online lookup tool to see if any of the above issues exist. If detected, contact an expert and have it fixed.

2. Properly configured DKIM for your domain
DKIM helps ensure the integrity of emails sent from your domain by verifying if the email was truly sent by the claimed sender and checking for any changes during transit. It uses a pair of cryptographic keys: a private key to sign emails and a public key to verify them.
3. Properly configured DMARC for your domain
To use BIMI, you must set up a DMARC record for your domain and publish it in your DNS. DMARC works with SPF and DKIM to help mail servers handle fake emails from your domain.
DMARC has three policy options: ‘none,’ ‘quarantine,’ and ‘reject.’ However, BIMI requires a policy stronger than ‘none,’ as it only monitors and doesn’t provide protection. For Zoho BIMI, first enforce a stricter DMARC policy, then proceed with the BIMI setup .
4. Getting a Verified Mark Certificate (VMC)
A Verified Mark Certificate (VMC) confirms that you own your brand logo, allowing you to use it to set up BIMI. While a VMC isn’t mandatory for all email providers, platforms like **Zoho Mail require one to enable BIMI. VMCs are issued by trusted certification authorities such as DigiCert , ensuring the authenticity of your logo and enhancing brand credibility in email communications.
How Do You Configure BIMI for Zoho Mail?
1. Create your brand logo
-
Use a BIMI SVG logo converter to convert your logo to SVG Tiny 1.2 format.
-
Make sure the logo is square, under 32 KB in size, and has a solid background.
-
Ensure the logo does not include animations or interactive features.
2. Generate a BIMI record for your domain
-
Sign up for free on online BIMI record-generating tools.
-
Enter your domain name, logo URL, VMC, selector (optional), and email address (optional).
3. Create and configure your BIMI record
-
Enter your domain name, logo URL, and VMC certificate details.
-
Publish the generated BIMI record in your DNS.
-
Example TXT record: v=BIMI1;l=https://domain.com/image.svg;a=https://domain.com/certificate.pem
4. Verify your BIMI record
Use a credible BIMI lookup tool to confirm that the record is correctly set up. Once you have done this, your BIMI logo will appear in Zoho Mail and other BIMI-supporting email clients.
Sources
Topics
Content Specialist
Content Specialist at DMARC Report. Writes vendor-specific email authentication guides and troubleshooting walkthroughs.
LinkedIn Profile →Take control of your DMARC reports
Turn raw XML into actionable dashboards. Start free - no credit card required.