How to Set Up DKIM for Constant Contact

Quick Answer
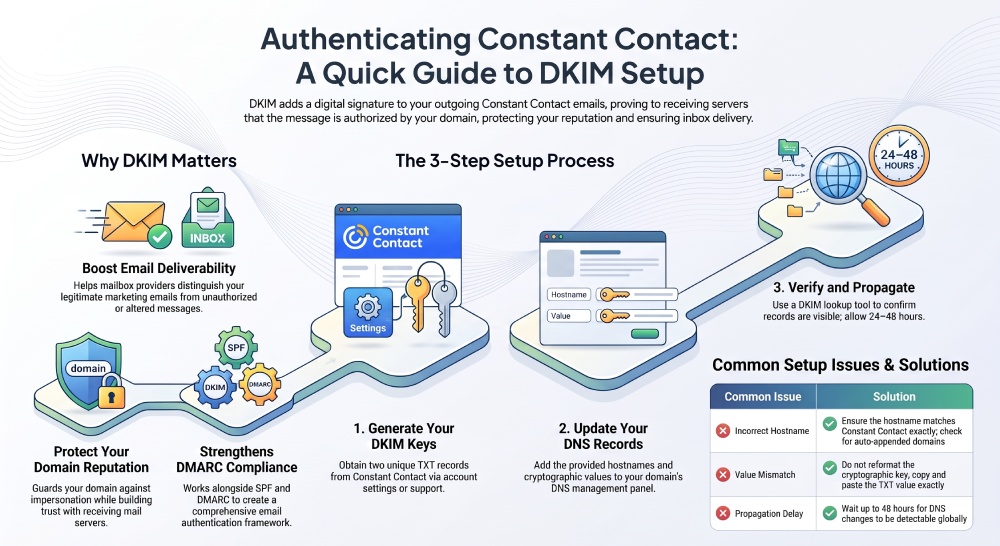
To set up DKIM for Constant Contact, obtain the authentication records, add the required DNS records to your domain, and verify that they are publicly visible. Correct DKIM configuration helps authenticate your marketing emails, improve sender trust, and support better email deliverability.
Try Our Free DKIM Lookup
Auto-discover DKIM selectors for any domain - scan 185 common selectors across all major providers.
Discover DKIM Selectors →If you use Constant Contact to send marketing emails from your own domain, configuring DKIM is an important step toward establishing your domain as a trusted sender. DKIM, or DomainKeys Identified Mail, adds a digital signature to outgoing messages so receiving mail servers can verify that an email was authorized by the domain it claims to come from.
Setting up DKIM for Constant Contact requires adding the DNS information provided by the platform to your domain’s DNS configuration. Once the records are published and recognized, Constant Contact can authenticate messages sent using your domain.
Why Configure DKIM for Constant Contact?
Email authentication helps receiving mail systems distinguish legitimate messages from emails that may have been altered or sent by unauthorized parties.
Without proper authentication, marketing emails sent through a third-party platform can face authentication problems, which may affect delivery and sender reputation. DKIM gives receiving servers a way to validate the cryptographic signature attached to your messages.
When DKIM is correctly configured, it can help:
- Confirm that messages were authorized by your sending domain
- Protect your domain against certain forms of email impersonation
- Improve trust in emails sent through Constant Contact
- Support better email authentication and deliverability
- Contribute to a stronger DMARC implementation
What You Need Before Starting
Before configuring DKIM, make sure you have administrative access to the DNS settings for the domain you plan to authenticate.
You will also need access to your Constant Contact account. Depending on your account configuration and the Constant Contact interface available to you, the platform can provide the DKIM information required for DNS configuration.
The setup generally involves publishing two TXT records in your domain’s DNS.
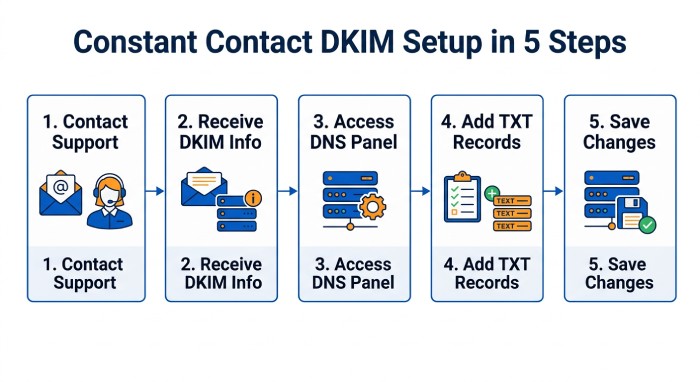
Method 1: Request DKIM Details From Constant Contact
One way to obtain your DKIM configuration information is to contact Constant Contact’s account review or deliverability support team.
Step 1: Contact Constant Contact
Reach out to Constant Contact and let their team know that you want to authenticate a custom domain for email sending.
Clearly identify the domain or domains you want to use with Constant Contact.
Step 2: Receive Your DKIM Information
After reviewing your request, Constant Contact can provide the DNS information required to authenticate your domain.
This information includes the DKIM keys and the corresponding TXT record details that need to be added to your DNS.
Keep these values available because you will need to enter them exactly as provided.
Step 3: Access Your DNS Management Panel
Sign in to the DNS provider responsible for managing your domain.
Depending on your provider, the DNS management area may be called something such as:
- DNS Management
- DNS Records
- Zone Editor
- Advanced DNS
- Manage DNS
Locate the section where you can create or modify TXT records.
Step 4: Add the DKIM TXT Records
Create the TXT records supplied by Constant Contact.
Enter the hostname or record name in the appropriate field and place the DKIM value provided by Constant Contact into the TXT record’s value or content field.
Because DKIM values are cryptographic information, avoid changing, removing, or reformatting any portion of the value unless your DNS provider specifically requires a particular format.
Repeat the process for the second TXT record.
Step 5: Save the DNS Changes
Save the newly created records.
DNS changes may not become visible immediately. Depending on your DNS provider and caching, you may need to wait before the records can be detected by Constant Contact or external verification tools.
Method 2: Generate DKIM Information From Constant Contact
If your Constant Contact account provides the self-authentication option, you can initiate the DKIM setup directly from your account.
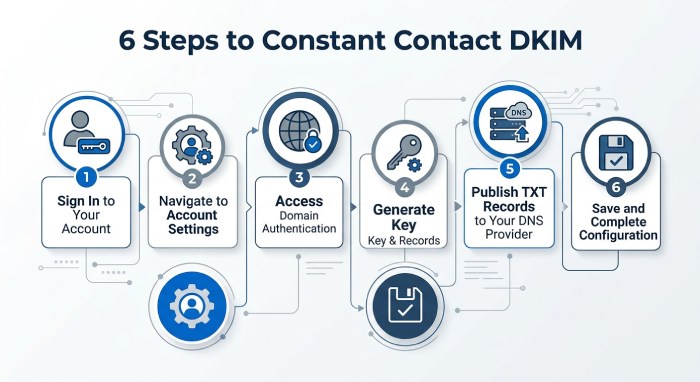
Step 1: Sign In
Log in to your Constant Contact account.
Step 2: Open Account Settings
Go to your account or profile settings and locate the area associated with email authentication or campaign email authentication.
The exact location and wording of settings can vary depending on the Constant Contact interface and account configuration.
Step 3: Choose Domain Authentication
Look for the option that allows you to authenticate emails using your own domain.
Select the self-authentication option and enter the domain you want to configure.
Step 4: Generate the DKIM Key
After entering your domain, use the option to generate the DKIM information.
Constant Contact should provide the DNS values needed to establish DKIM authentication for your domain.
Step 5: Publish the DNS Records
Open your domain’s DNS management console.
Create the TXT records specified by Constant Contact. Make sure that:
- The hostname is entered in the record-name field.
- The DKIM value is placed in the TXT content/value field.
- Both required records are added.
- No characters are accidentally removed from the provided values.
If you are not comfortable modifying DNS records yourself, your domain administrator or hosting provider can make these changes for you.
Step 6: Save the Configuration
Save the DNS records after entering all of the required information.
Your DNS provider may take some time to publish the changes across the internet.
How to Verify Your Constant Contact DKIM Record
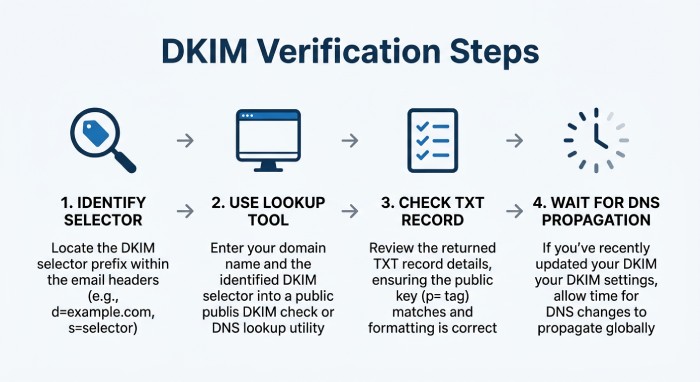 Publishing the records is only part of the process. You should also verify that the records are publicly available and correctly formatted.
A DKIM lookup tool can help you check whether the expected DKIM record can be retrieved from DNS.
To perform a basic verification:
- Identify the DKIM selector provided by Constant Contact.
- Use a DKIM lookup or DNS inspection tool.
- Enter the selector and your domain.
- Check whether the expected TXT record is returned.
- Review the result for missing or incorrectly configured information.
If the record is not detected immediately after publishing it, allow additional time for DNS propagation before troubleshooting the configuration.
Common DKIM Configuration Problems
Several issues can prevent Constant Contact DKIM authentication from working correctly.
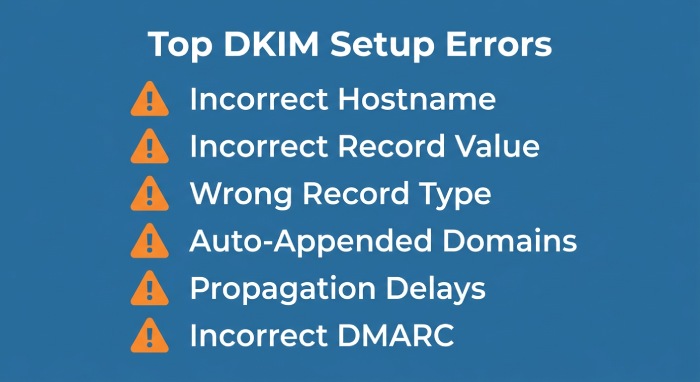
- Incorrect Hostname: The DNS hostname must exactly match the hostname provided by Constant Contact. If the hostname or selector is entered incorrectly, Constant Contact may be unable to find the record.
- Incorrect Record Value: For TXT authentication, the DKIM value contains the public key provided by Constant Contact. Even a small change to the value can cause authentication to fail. For CNAME authentication, make sure the CNAME target exactly matches the value provided by Constant Contact.
- Incorrect Record Type: Make sure you create the record type specified by Constant Contact. If the setup requires a CNAME, don’t create a TXT record instead, and vice versa.
- DNS Provider Automatically Adds the Domain: Some DNS providers automatically append your domain name to the hostname. This can result in an incorrect or duplicated hostname. Check how your DNS provider handles record names before saving the record.
- DNS Propagation Delays: Constant Contact notes that it can take approximately 24–48 hours for newly added authentication records to become detectable. If the records are correct but Constant Contact cannot find them immediately, allow time for DNS propagation.
- Incorrect DMARC Record: Constant Contact’s self-authentication process also requires a DMARC record. Make sure the DMARC hostname and value match the information provided by Constant Contact.
DKIM and DMARC
DKIM is particularly useful when it is implemented alongside other email authentication mechanisms such as SPF and DMARC.
SPF identifies authorized sending infrastructure through DNS, while DKIM validates a digital signature associated with the message. DMARC can then use authentication results from SPF and DKIM to determine whether messages meet the domain’s authentication requirements.
For organizations using Constant Contact for newsletters, promotions, announcements, or other campaigns, maintaining properly configured authentication records can help create a more reliable email authentication framework.
What to Do If DKIM Is Not Working
If Constant Contact continues to report an authentication problem after you publish the DNS records, review the configuration carefully.
Start by confirming that the correct domain was entered in Constant Contact. Then compare each DNS record with the information supplied by Constant Contact.
You should also check:
- Whether both required TXT records exist
- Whether the selector is correct
- Whether the TXT values were copied accurately
- Whether the records were added to the authoritative DNS provider
- Whether DNS changes have had enough time to propagate
- Whether another record is conflicting with the DKIM configuration
A DNS lookup tool can make it easier to determine whether the records are publicly accessible.
Final Thoughts
Setting up DKIM for Constant Contact involves obtaining the authentication details, adding the required TXT records to your domain’s DNS, and verifying that the records are publicly visible.
Although DNS configuration may initially seem technical, the process is straightforward when the supplied DKIM values are entered correctly. After completing the setup, verify the records and monitor your email authentication results to ensure Constant Contact messages are being properly authenticated.
For businesses that rely on email marketing, DKIM should be considered part of a broader email security strategy that includes SPF and DMARC. Together, these technologies can help establish greater trust in legitimate messages while reducing opportunities for domain impersonation.
General Manager
General Manager of DuoCircle. Product strategy and commercial lead for DMARC Report's 2,000+ customer base.
LinkedIn Profile →Take control of your DMARC reports
Turn raw XML into actionable dashboards. Start free - no credit card required.