Mailchimp SPF Setup: Step-By-Step Guide

Quick Answer
To set up SPF for Mailchimp, add Mailchimp's SPF include mechanism to your domain's existing SPF record, ensure you have only one SPF record, publish the changes in your DNS, and verify the configuration. This helps improve email deliverability and prevents SPF errors.
Setting up Mailchimp SPF correctly helps improve your domain’s email authentication and supports better email deliverability. Although Mailchimp primarily uses DKIM for domain authentication, having a properly configured SPF record can strengthen your overall email security. This helps reduce the chances of your emails being marked as spam or rejected by receiving mail servers. In this guide, you’ll learn how to configure Mailchimp SPF, update your DNS records, and verify your setup step by step.
What SPF Is and Why It Matters for Mailchimp Email Deliverability
SPF, or Sender Policy Framework, is an email authentication method that tells receiving email providers which mail servers are allowed to send messages on behalf of your domain. For a deeper primer on what is SPF, see our dedicated guide. In a Mailchimp context, a properly configured Mailchimp SPF setup helps inbox providers such as Gmail and Yahoo evaluate whether an email sender is legitimate.
SPF is published in your DNS records as a TXT record. When Mailchimp sends an email campaign using your custom domain in the campaign From field, receiving servers check the SPF record, DKIM signature, and DMARC policy to determine whether the message should be accepted, filtered, or rejected.
SPF, DKIM, and DMARC Work Together
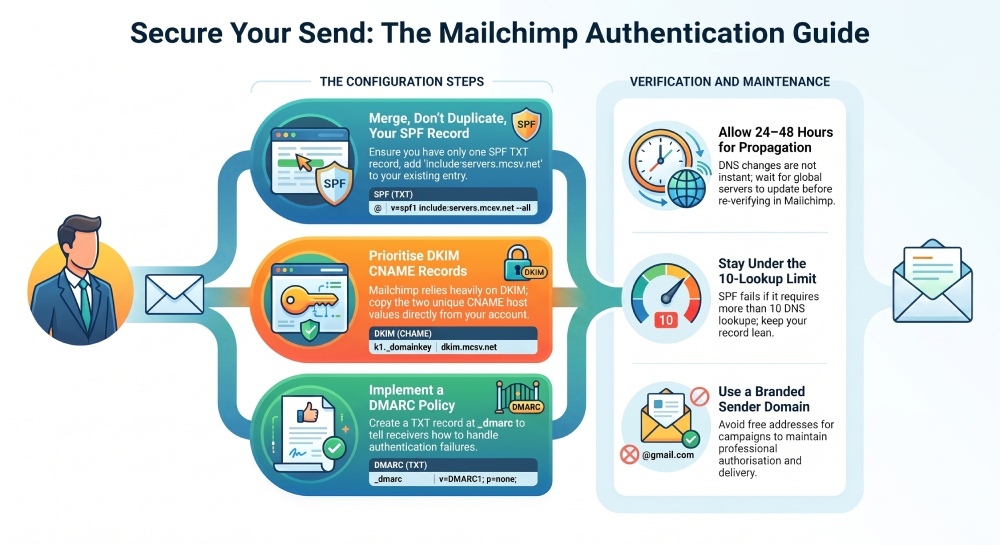
SPF is only one part of modern email authentication. For strong domain authentication, you should configure:
- SPF to authorize sending servers
- DKIM to cryptographically sign messages
- DMARC to tell receivers how to handle authentication failures
Mailchimp relies heavily on DKIM for domain authentication, while SPF helps support sender authentication and reduce delivery issues. A complete Mailchimp SPF configuration should be reviewed alongside DKIM and DMARC, not treated as a standalone fix. If the roles blur together, our guide on the difference between SPF, DKIM, and DMARC breaks each one down.
Why This Matters for Spam Protection and Phishing Prevention
Mailbox providers use email authentication for spam protection and phishing prevention. If your SPF record, DKIM, or DMARC setup is missing or misaligned, your email delivery may suffer. You may see more spam-folder placement, a Mailchimp delivery warning, or increased email bounces.
Using a free email address from public email services like Gmail, Yahoo, or Outlook as your sender can also cause delivery problems. Mailchimp recommends using a branded email address on a verified custom domain instead.
Prerequisites: Domain Access, DNS Provider, and Existing SPF Record Check
Before you set up Mailchimp SPF, confirm that you have access to your domain’s DNS settings. Your DNS provider may be GoDaddy, Namecheap, Bluehost, Dreamhost, Hostgator, Hover, IONOS, Siteground, Wix, Squarespace, Stablehost, WordPress hosting, Amazon Web Services Route 53, or the former Google Domains platform now commonly managed through Squarespace.
Confirm Domain Ownership and Mailchimp Access
You need access to both your Mailchimp account and your domain registrar or DNS host. Mailchimp may ask you to verify domain ownership before you complete full domain authentication.
This domain verification step usually confirms that you control the sender domain. Mailchimp may send a confirmation message to an address on that domain, or provide authentication instructions inside the domain settings.
Verify Email Domain First
In Mailchimp, go to your domain settings and choose the option to verify email domain or begin email domain verification. After domain verification, you can continue with email domain authentication, including DKIM and SPF-related DNS changes.
Check for an Existing SPF Record
Most domains should have only one SPF record. In the Domain Name System, SPF is published as a TXT record at the root domain, usually represented by @. An existing SPF record may look like this:
v=spf1 include:_spf.google.com include:servers.mcsv.net ~allIf you already use Google Workspace, Microsoft 365, Mailchimp Transactional, QuickBooks, TurboTax-related Intuit services, Credit Karma notifications, or other email providers, your SPF record may already contain multiple include mechanisms.
Avoid Multiple SPF TXT Records
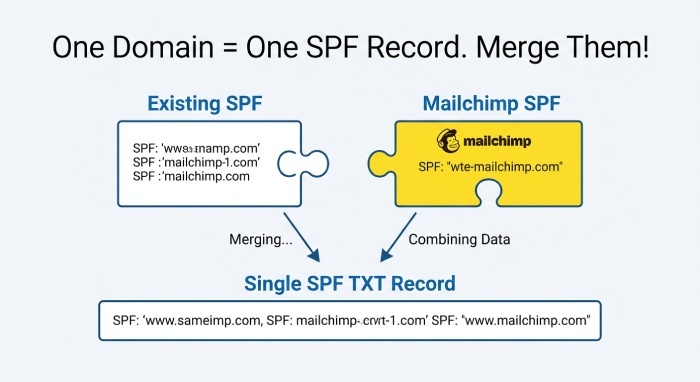
Do not create a second SPF TXT record. Multiple SPF records can fail record validation and cause delivery issues. Instead, merge Mailchimp’s SPF into your existing SPF record.
Step-by-Step Mailchimp SPF Setup in Your DNS Records
A standard Mailchimp SPF setup involves adding or updating a TXT record in your DNS records. For many Mailchimp Marketing campaigns, Mailchimp emphasizes DKIM-based domain authentication through CNAME records. However, if your DNS or compliance workflow requires SPF authorization for Mailchimp sending, the commonly used include is: include:servers.mcsv.net
For Mailchimp Transactional Email, formerly Mandrill, SPF may use:
include:spf.mandrillapp.com
Always confirm the latest authentication instructions inside Mailchimp before making changes.
Step 1: Open Your Mailchimp Domain Settings
Log in to Mailchimp and go to your domain settings. Select the domain you want to authenticate. If domain verification has not been completed, finish that first.
Mailchimp may show options for automatic authentication using Entri, or manual authentication if you prefer to edit DNS records yourself.
Automatic Authentication with Entri
With Entri, Mailchimp can guide you through DNS updates by connecting to supported providers. This is useful if you are less familiar with DNS records, TXT record formatting, or CNAME record placement.
Manual Authentication
For manual authentication, Mailchimp displays the required DKIM CNAME records and any relevant SPF guidance. Copy each host value and point to the value exactly as shown.
Step 2: Add or Update the SPF TXT Record
Go to your DNS provider and locate the DNS zone editor. Find the TXT record for SPF. If no SPF record exists, create a new TXT record:
Host/Name: @
Value: v=spf1 include:servers.mcsv.net ~all
Type: TXT
If an SPF record already exists, edit it instead of adding a duplicate:
v=spf1 include:_spf.google.com include:servers.mcsv.net ~allSPF Record Syntax Tips
Your SPF record must start with v=spf1 and end with a mechanism such as ~all, -all, or ?all. The include:servers.mcsv.net portion authorizes Mailchimp’s sending infrastructure for Mailchimp SPF. You can assemble a valid record with our free SPF record generator.
Step 3: Add Mailchimp DKIM CNAME Records
Mailchimp domain authentication typically requires DKIM records as CNAME entries. You may see records labeled CNAME 1 and CNAME 2.
Example format:
Type: CNAME
Host value: k1._domainkey.example.com
Points to value: dkim.mcsv.net
The exact host value and points to value must come from your Mailchimp account. Do not guess them.
CNAME Record Formatting
Some DNS providers automatically append your domain name. Others require the full hostname. This is why a CNAME record copied incorrectly can keep authentication in progress for hours. If DKIM fails, your overall domain authentication may remain incomplete even if the SPF record is valid.
Step 4: Add or Review DMARC
A DMARC TXT record is usually added at _dmarc.yourdomain.com.
A basic monitoring policy looks like:
v=DMARC1; p=none; rua=mailto:dmarc@yourdomain.comDMARC checks whether SPF or DKIM aligns with the visible From domain. For Mailchimp, DKIM alignment is especially important, so do not skip DKIM when setting up Mailchimp SPF.
How to Verify Your Mailchimp SPF Record and Troubleshoot Common Errors
After updating DNS records, wait for DNS propagation. Some DNS servers update within minutes, while others may take up to 24–48 hours.
Verify in Mailchimp
Return to Mailchimp and click the option to authenticate, verify, or check status. If you see authentication in progress, wait and check again later. Mailchimp’s validation process depends on DNS propagation and correct record formatting.
You can also use external lookup tools to inspect your SPF record, DKIM CNAME record, and DMARC TXT record.
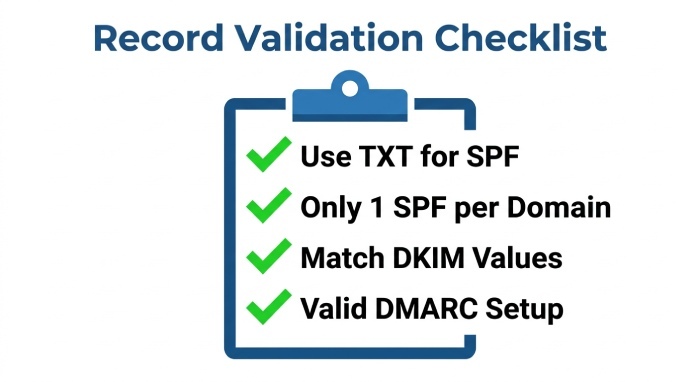
Record Validation Checklist
Check the following:
- The SPF record is a TXT record, not a CNAME record.
- There is only one SPF record for the domain.
- The SPF record includes Mailchimp correctly.
- DKIM CNAME records match Mailchimp’s host value and points to value.
- DMARC exists and does not conflict with your Mailchimp sending setup.
Common Mailchimp SPF Errors
A common Mailchimp SPF issue is adding a second TXT record instead of editing the existing one. Another common mistake is placing the SPF record on a subdomain when Mailchimp sends from the root domain, or vice versa.
How to Resolve Authentication Problems
If Mailchimp cannot validate your records, use the resolve authentication prompts in your account. In some cases, you may need to restart authentication after correcting DNS records.
Also, verify that your DNS provider did not add extra quotation marks, spaces, or your domain name twice. Providers such as GoDaddy, Namecheap, Wix, Squarespace, Bluehost, Dreamhost, Hostgator, IONOS, Hover, Stablehost, Siteground, WordPress hosts, and Amazon Web Services may display DNS fields differently.
Best Practices for Maintaining SPF, DKIM, and DMARC with Mailchimp
Maintaining email authentication is an ongoing process. Your Mailchimp SPF, DKIM, and DMARC records should be reviewed whenever you change email providers, add a new platform, or move DNS hosting.
Keep SPF Lean and Accurate
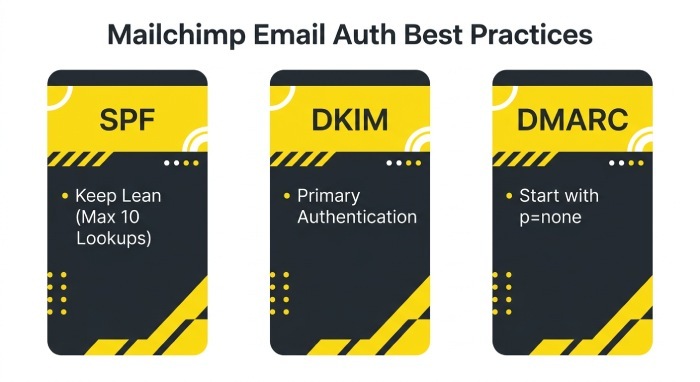
SPF has a DNS lookup limit of 10. Too many includes can break SPF authentication. If your domain uses Mailchimp, Google Workspace, QuickBooks, Intuit systems, Transactional Email tools, customer relationship management (CRM) platforms, or support desk software, consolidate carefully.
Monitor Email Delivery
Watch Mailchimp reports for email bounces, spam complaints, and delivery warning messages. If email delivery declines after a DNS change, review your SPF record, DKIM CNAME record, and DMARC policy immediately.
Prioritize DKIM for Mailchimp Domain Authentication
For Mailchimp, DKIM is central to domain authentication. Correct DKIM CNAME records help prove that Mailchimp is authorized to send signed mail for your domain. Your Mailchimp SPF setup supports sender authentication, but DKIM and DMARC are often what Gmail, Yahoo, and other email providers rely on for alignment checks.
Review DMARC Before Enforcing
Start DMARC with p=none, review reports, then move gradually to quarantine or reject when you are confident that legitimate sources pass email authentication.
Use a Branded Sender Domain
Avoid sending marketing campaigns from public email services or a free email address. Use a verified custom domain, complete domain verification, and maintain DNS records carefully.
This approach improves Mailchimp SPF alignment, strengthens email authentication, and gives your audience more confidence that your email campaign is legitimate.
General Manager
General Manager of DuoCircle. Product strategy and commercial lead for DMARC Report's 2,000+ customer base.
LinkedIn Profile →Take control of your DMARC reports
Turn raw XML into actionable dashboards. Start free - no credit card required.