Shopify SPF, DMARC & DKIM Setup: Step-By-Step Guide

Quick Answer
To set up SPF, DMARC, and DKIM for Shopify, configure the required DNS records, verify domain authentication, and monitor results. These protocols help authenticate Shopify emails, improve deliverability, and reduce spoofing and phishing risks.
Try Our Free DMARC Checker
Validate your DMARC policy, check alignment settings, and verify reporting configuration.
Check DMARC Record →Mastering email authentication for your Shopify store is important for protecting your domain reputation and supporting reliable email delivery. Proper configuration of Shopify SPF, DKIM, and DMARC can help authenticate your sender email, protect your domain from spoofing, and improve the reliability of order confirmations, marketing messages, and customer support emails. In this guide, you’ll learn how to configure Shopify SPF, DKIM, and DMARC, along with practical setup tips, best practices, and troubleshooting steps.
Why Shopify SPF, DKIM, and DMARC Matter for Email Deliverability
Shopify store owners rely on effective email delivery for everything from order notifications and customer inquiries to branded marketing campaigns. However, without robust email authentication—specifically configuring Shopify SPF, DKIM, and a DMARC record—your sender emails risk ending up in spam folders or being rejected outright by major providers such as Gmail and Yahoo.
The Role of Email Authentication in Protecting Your Brand
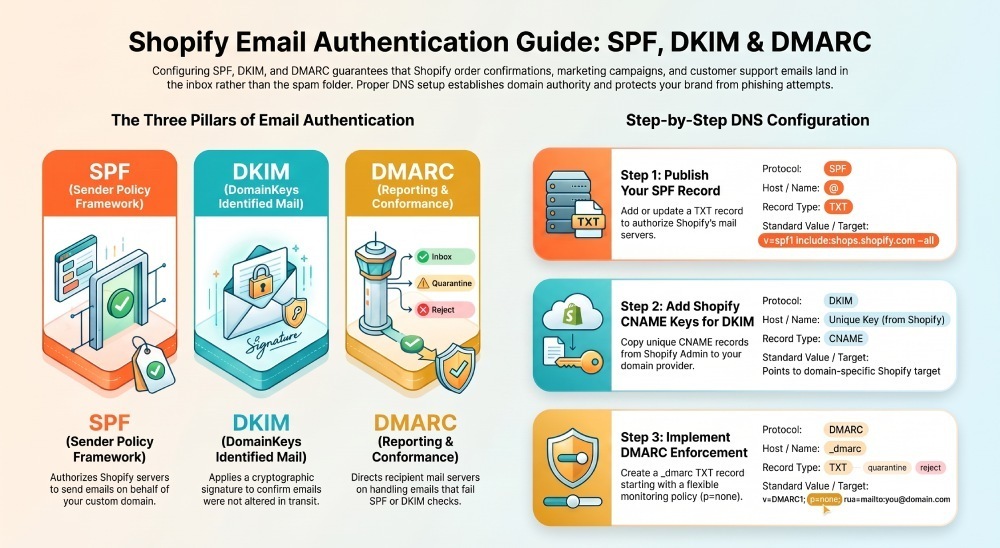
Email authentication is critical for domain authentication, which confirms that your messages are genuinely sent from your Shopify store, not a malicious actor. SPF (Sender Policy Framework) helps verify that Shopify is authorized to send emails on your behalf. DKIM (DomainKeys Identified Mail) digitally signs emails from your Shopify website, ensuring authenticity. DMARC (Domain-based Message Authentication, Reporting & Conformance) builds on SPF and DKIM to give you control over how recipient servers process unauthenticated emails supposedly from your domain.
Why This Matters for Shopify Stores
- Higher Deliverability: Proper Shopify SPF and DKIM configuration ensures your store’s communications—like order confirmation emails and marketing messages—land in the inbox.
- Branding & Professionalism: Using a branded email address boosts customer trust and confidence.
- Security & Anti-phishing: Authenticated sender email helps block spoofing attempts, protecting both your brand and customers.
Prerequisites: Domain Access, DNS Records, and Shopify Email Settings
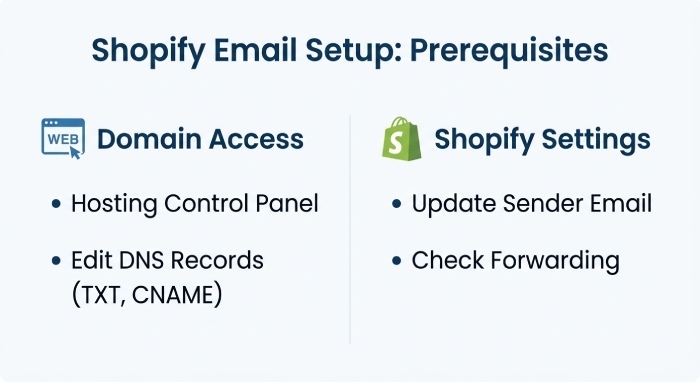
Before you configure Shopify SPF, DKIM, and your DMARC record, ensure you have the necessary access and information.
Verifying Domain Ownership and Access
To modify email authentication settings, you need access to your domain hosting provider’s control panel. If your custom domain is managed through Cloudflare, GoDaddy, IONOS, or another popular domain provider, locate your DNS records section—often called the domain manager.
What You Need
- Access to your third-party domain provider or Shopify-managed domain.
- Ability to add/edit DNS records (TXT record, CNAME records).
Required Shopify Settings
Within Shopify admin, confirm that your sender email and store email addresses are up to date in General Settings. This is crucial for notifications and ensures that your support email, contact email, and order notifications are properly routed.
Key Email Settings
- Account Email: Used for store-related communications.
- Sender Email / Store Email: Used for customer-facing communications and marketing emails.
- Email Notifications Settings: Review to ensure emails use your branded sender email.
Considerations for Email Forwarding
If you use email forwarding (e.g., via Gmail, Yahoo, or a webmail solution), review how SPF and DKIM records align to avoid authentication breaks.
Step-by-Step Shopify SPF Setup: Adding or Updating Your SPF Record
Properly configuring your Shopify SPF record is the foundation for authenticating messages sent from your Shopify store, including transaction emails and promotional content.
Locating Your Shopify SPF Value
Shopify recommends a specific SPF value to authorize their servers. Find this in your Shopify admin (Domains > desired domain > Domain authentication):
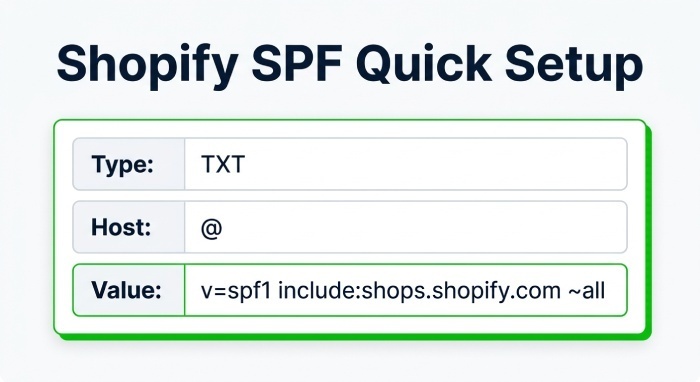
Typical Shopify SPF value:
v=spf1 include:shops.shopify.com ~allAdding or Modifying SPF in Your DNS Records
For Third-Party Domains (e.g., GoDaddy, Cloudflare, IONOS)
- Login to your domain provider’s domain manager.
- Navigate to the section for DNS records.
- Add a new TXT record, or update your existing SPF record to include Shopify’s recommended value.
- Name/Host: @ or your root domain.
- Type: TXT record.
- Value:
v=spf1 include:shops.shopify.com ~all
- Save changes and allow up to 48 hours for propagation.
Multi-Service SPF Records
If you use other email services (Gmail, Yahoo, newsletters), combine them in a single SPF record:
v=spf1 include:shops.shopify.com include:_spf.google.com ~allShopify-Managed Domains
For domains purchased through Shopify, SPF records are added automatically via automatic authentication. Check in Shopify admin under the domain authentication section to confirm setup.
Verifying Your SPF Record
After updating, use online tools (such as MXToolbox) or run an email delivery test to ensure your spf record is correctly published and detected.
Setting Up DKIM and DMARC for Shopify: DNS Configuration and Policy Tips
While Shopify handles a portion of DKIM and DMARC through automatic authentication for Shopify domains, you may need to configure these records manually when using a third-party domain provider.
DKIM Record Setup
Retrieving DKIM Details
In Shopify admin, go to Settings > Notifications > Sender email > Email domain authentication. Shopify will display the CNAME records required to authenticate your sender domain. These CNAME records handle both SPF and DKIM authentication for Shopify Email. Copy all CNAME records shown in Shopify and add them to the DNS settings for your sender domain. The number and values of the records can vary, so use the records provided for your specific domain rather than relying on a generic Shopify CNAME value.
Adding CNAME Records for DKIM
- Log in to Cloudflare, GoDaddy, IONOS, or your chosen provider.
- Navigate to DNS records management.
- Add the supplied CNAME records:
- Name/Host: as provided by Shopify
- Type: CNAME
- Value/Points to: as specified (typically ending in shopify.com)
- Save changes.
DKIM for Forwarded/Branded Email Addresses
If your support email or custom branded address is set up with an external mail provider (e.g., Gmail workspace), you may need to add DKIM records for those services as well.
DMARC Record Setup
Establishing a Policy with a DMARC Record
A properly configured DMARC record helps protect your store from spoofing and phishing attacks. Add a TXT record to your DNS settings:
- Host/Name:
_dmarc - Type: TXT
- Value:
v=DMARC1; p=quarantine; rua=mailto:your-email@yourdomain.com- Change the policy (p=) to none, quarantine, or reject based on your tolerance for unauthenticated mail.
Policy Tips for Shopify Email Authentication
- Start with p=none to monitor authentication health before tightening enforcement.
- Add an email address to rua to receive DMARC reports, aiding in ongoing website audit and troubleshooting.
Manual vs. Automatic Authentication
Shopify-Managed Domains
For domains purchased through Shopify, email authentication is configured automatically, including DKIM, SPF, and DMARC. For eligible third-party domains, Shopify’s automatic authentication can configure the CNAME records required for SPF and DKIM, but you must add a DMARC record separately.
Third-Party Domains
For third-party domains, you can use Shopify’s automatic authentication if your domain provider is supported, or manually add the CNAME records provided by Shopify. A DMARC record must be configured separately.
Testing, Troubleshooting, and Maintaining Your Shopify Email Authentication
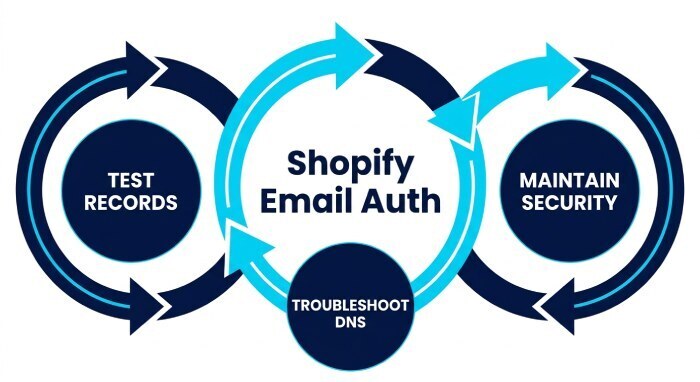
Email authentication is not a one-time task. Continuous review and troubleshooting ensure that your Shopify store maintains optimal security and deliverability.
Testing Your Shopify SPF, DKIM, and DMARC Records
- Use free online tools to inspect your domain’s DNS records and look for proper SPF, DKIM, and DMARC setup.
- Send test emails to Gmail and Yahoo accounts to verify whether emails appear as authenticated.
- Check headers in received messages to confirm authentication pass/fail.
Common Problems and Troubleshooting Steps
Issues with Email Forwarding
If using email forwarding (e.g., forwarding a store email to a personal Gmail), verify that SPF and DKIM are not broken in the process. Forwarding can sometimes strip or modify headers, causing authentication failures.
Misconfigured or Missing DNS Records
- Double-check that there are not multiple SPF records, which can cause failure.
- Ensure no typos exist in TXT or CNAME records.
- Confirm DNS propagation is complete—changes can take 24-48 hours.
Shopify Support & Partner Assistance
For persistent authentication problems, consult the Shopify Help Center or contact Shopify Support for assistance with your domain and email authentication settings.
Long-Term Maintenance Best Practices
- Regularly review your domain’s SPF, DKIM, and DMARC status, especially after any domain changes or Shopify store design updates.
- Coordinate with your email marketing and social media marketing teams to ensure all sender email platforms are authenticated.
- Schedule periodic DNS record reviews as part of your online store maintenance routine.
With these steps, you ensure that your Shopify SPF, DMARC, and DKIM configurations are not only implemented correctly but maintained for ongoing brand protection, flawless email delivery, and a trustworthy customer experience on your Shopify website.
General Manager
General Manager of DuoCircle. Product strategy and commercial lead for DMARC Report's 2,000+ customer base.
LinkedIn Profile →Take control of your DMARC reports
Turn raw XML into actionable dashboards. Start free - no credit card required.