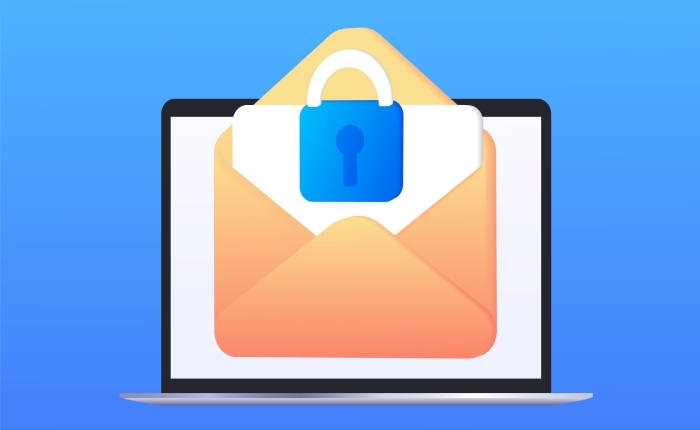
In an age where email communication is a cornerstone of both business and personal interactions, securing your domain against cyber threats has never been more important. One key player in this battle for safety is DMARC, or Domain-based Message Authentication, Reporting, and Conformance. Setting up DMARC not only helps protect your brand’s reputation but also ensures that legitimate emails land in inboxes rather than spam folders. If you’ve ever wondered how to navigate the murky waters of email security, you’re in the right place. This guide will walk you through the steps to add a DMARC record in GoDaddy, making it simpler than ever to bolster your email’s defenses and keep those pesky phishing attempts at bay. So, let’s dive right in!
How to Add a DMARC Record in GoDaddy ,Log in to your GoDaddy account, select your domain, and navigate to the DNS settings. Then, choose ‘Add New Record,’ select TXT for the record type, enter ‘_dmarc’ as the name, and input your desired DMARC policy string (e.g., “v=DMARC1; p=quarantine; rua=mailto:your-email@example.com”) into the value field before saving the record.
Accessing Your DNS Settings in GoDaddy
To begin the journey, ensure you’re logged into your GoDaddy account. Simply enter your username and password, then hit that enticing “Sign In” button. As you land on the main dashboard, scan for the “My Products” area. Here, you’ll find an overview of all the domains you control—a virtual playground awaiting your attention.
Once you’ve spotted the domain you wish to work with, just click on it. A treasure trove of options will unfold before you. Now look for the “DNS Management” tab; this is typically nestled under Additional Settings and is your gateway to customization. Clicking this will transport you to the DNS Management interface where all the magic happens.
Within this DNS Management section lies an array of records—A, AAAA, CNAME, TXT, and MX—that illustrate how your domain communicates and functions online.
If everything is set up correctly, you’ll see a table containing existing records alongside options to edit or add new ones. Each record type plays a key part in maintaining communication between your domain and its users. Therefore, it’s essential to understand that any alteration here can significantly impact how emails are sent or received through your domain.

At this stage, take a moment to absorb the layout of this interface. Familiarizing yourself with where key records reside empowers you to make changes confidently. Knowing that it’s possible to tweak anything from your mail server settings to verification protocols ensures you’re equally equipped for future modifications.
With a firm grasp on navigating your DNS settings in GoDaddy, it’s time to transition towards adding essential security measures to your email configuration. The next step involves crucial processes that will fortify your domain’s integrity.
Logging Into Your GoDaddy Account
Logging into your GoDaddy account is more than just a simple task; it’s your gateway to managing your domains and configurations. First, head over to GoDaddy’s homepage where you can find the prominent “Sign In” button perched at the top right corner of the screen. It’s almost like a friendly invitation welcoming you back into your digital space.
Once clicked, you’re brought to a familiar login page that requires just a few carefully chosen words: your username or customer number. If you’ve forgotten your username, don’t panic! GoDaddy has anticipated this moment—the handy link labeled “Forgot Username” is there for just such occasions. This alleviates the stress of forgetting and gives you reassurance as you proceed.
Now that you’ve entered your username, it’s time to type in your password.

As you input your password—make sure it is the right one—think of each character as the key to a treasure chest filled with valuable information about your domains and email settings. A mere slip can lock you out, so here’s a quick tip: avoid typing hastily. Take those extra seconds to ensure each letter is correct; after all, getting locked out can be quite inconvenient.
When you’re ready, hit that “Sign In” button and, voilà! You should find yourself whisked away into your user dashboard—a bustling hub where all your domain-related activities await.
Speaking of security, this is a great point to consider enabling two-factor authentication (2FA). It adds an additional layer of safety by sending a verification code to your phone every time you log in. Imagine having peace of mind knowing that even if someone got ahold of your username and password, they still wouldn’t have the magic code necessary to enter.
With everything set up properly, you’ll find logging in a breeze while enjoying enhanced security alongside ease of access.
Having established secure access to your account, it’s now essential to understand how to manage the configurations effectively for optimal performance in upcoming tasks.
Navigating the DNS Management Interface
The DNS management interface is essentially your command center for all things related to your domain. It’s where you can control and customize your settings with just a few clicks, ensuring that everything runs smoothly. When you first land on this interface after clicking “DNS Management,” you’ll notice several key sections waiting for your attention: Records, Nameservers, and Forwarding.

Detailed Breakdown
Each of these sections plays an important role. Within the Records section, you have the power to manage your DNS records like A, CNAME, TXT, and many others. Here’s where the magic happens if you’re looking to set up DMARC. You might need to modify a TXT record specifically tailored for DMARC purposes, which involves crafting a text string that tells email servers how to handle messages sent from your domain.
| Section | Purpose |
| Records | Manage DNS records like A, CNAME, TXT |
| Nameservers | Control the nameservers for your domain |
| Forwarding | Set up domain forwarding or redirect URLs |
Next up is the Nameservers section. This is crucial because nameservers are like your domain’s GPS system – they direct internet traffic to where it needs to go. If you’ve purchased hosting through GoDaddy or kept their nameservers for another provider, this is where you can indicate which server should take precedence in directing traffic related to your domain.
After familiarizing yourself with these sections, understanding how they relate to one another will enhance your ability to manage DNS effectively.
Finally, there’s the Forwarding section, which allows you to set up redirects. This is handy if you’ve ever changed domains or want a temporary URL redirection. Imagine having a shop at a new location; you’d want everyone who knew your old address to find your new one seamlessly!
By setting up forwarding correctly, visitors can still access your website without issue, maintaining continuity and user experience even during transitions.
That said, whenever you’re making changes in this interface—especially when modifying records—it’s wise to note how these alterations could affect your email services or website functionality. Taking a moment to ensure you’ve accurately entered everything can save you potential headaches down the road as you configure DMARC and tighten up your email security measures.
With this foundational knowledge about managing DNS at your fingertips, you’re well-prepared to dive deeper into establishing specific configurations needed for email authentication.
Setting Up Your DMARC Record
DMARC allows domain owners to specify how they want email receivers to handle different types of emails coming from their domain. This control is crucial for protecting your reputation and ensuring that only legitimate emails are delivered. The three primary policies you can adopt as part of your DMARC record are none, quarantine, and reject. Each option serves a distinct purpose, and choosing the right one depends on your organization’s needs.
Policy Types Explained
The first option, p=none, allows you to monitor your email traffic without taking any action against unauthorized emails. This passive approach helps you gather valuable data without disrupting communication. By generating reports, you can view how many of your emails pass or fail authentication checks—an excellent way to familiarize yourself with potential vulnerabilities.
Imagine this as peeking into your mailroom to see if mail carriers are delivering junk instead of valuable letters without interrupting their work.
On the other hand, p=quarantine takes things a step further by directing suspicious emails into the spam or junk folder. This approach protects against phishing threats while allowing end-users to review potentially misplaced emails. It’s like having a cautious bouncer who lets in most patrons but keeps an eye on anyone who raises suspicion.
Finally, the p=reject policy provides the strongest safeguard by completely blocking any non-compliant emails before they reach the inbox. This means that if someone tries to impersonate your domain with unauthorized messages, they won’t even make it past the gate—amazing protection! Statistics show that businesses enforcing this policy see around a 70% reduction in email spoofing attempts, significantly enhancing their cybersecurity posture.
As you consider these policies, it’s essential to understand how each option can shape your email management strategy. Let’s explore the steps involved in implementing your chosen DMARC record effectively.

Entering Your DMARC Record
When it comes to setting up a DMARC record, the process can seem daunting at first, but it’s quite straightforward once you know what to do. The first step begins in the DNS Management interface of GoDaddy, where you’ll find yourself amidst a sea of existing records that already govern how your domain operates. Don’t be intimidated; the key here is to stay focused on adding your new record without disrupting anything else.
Start by locating the “Records” section. Once you’re there, you’ll see an “Add” button, which is your gateway to creating something new and vital for your email security. Clicking on that will unfold options before you. In this case, you’ll want to select the “TXT” record type from the drop-down menu. This is essential because DMARC is communicated through a TXT record.
In the next field labeled “Name,” it’s crucial to insert _dmarc. This gives your record a unique identity recognized by email servers scanning for DMARC policies. Every detail matters here because any small typo can lead to failure in authentication. It’s like writing an invitation: if the address is wrong, no one will find the party!
Once you’ve hustled through entering the name, it’s time to move on to the detailed part—inputting values in the “Value” field.
Here’s where you get creative yet precise. Enter a value that includes parameters for how you’d like DMARC to function. For instance, you might input something like:
v=DMARC1; p=quarantine; pct=100; rua=mailto:admin@yourdomain.com; ruf=mailto:admin@yourdomain.com
Each parameter serves a specific purpose:
- v=DMARC1 indicates this is indeed a DMARC record.
- p=quarantine tells receiving servers what to do with emails that fail checks (in this case, send them to spam).
- pct=100 means this policy applies to 100% of your emails.
- The rua and ruf parameters designate the addresses where aggregate and failure reports should be sent.

Remember that each piece of this information is fundamental for ensuring your email system’s integrity and security. You’ll want to replace “admin@yourdomain.com” with your own email address so you stay informed about any discrepancies or issues.
After carefully inputting all those details, don’t rush through saving changes; take a moment to double-check everything.
Make sure you hit “Save” once you’re done so that your new DMARC record becomes part of your domain settings. Skipping this step can leave you stranded in limbo without any actual protection! Changes made in DNS require some time to propagate—usually within an hour but sometimes taking up to 48 hours globally—so don’t fret if results aren’t immediate.
By following these clear steps and understanding each element’s significance, you’re not just setting up a DMARC record; you’re fortifying your digital communications against abuse and fraud.
With your DMARC configuration complete, attention now shifts toward ensuring everything functions smoothly in practice. Let’s explore how to verify that setup effectively.
Verifying Proper Configuration
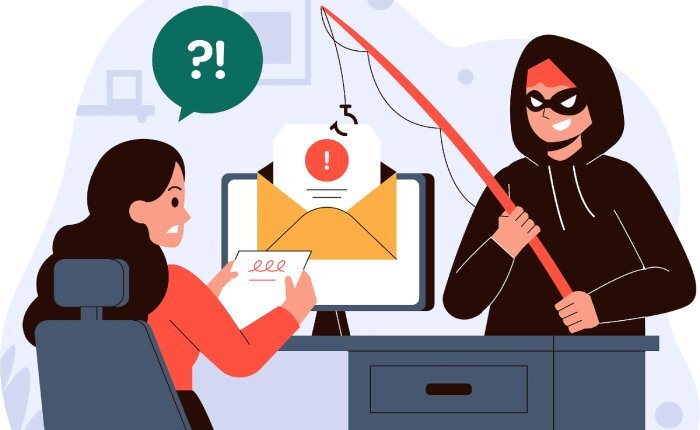
Verifying your DMARC record is crucial to confirm that it’s working as intended. You need to know whether your email is being authenticated correctly, as this safeguards your domain from potential misuse. Imagine, for instance, you’ve set up everything perfectly, but without verification, you could still be vulnerable to phishing attacks or have your legitimate emails flagged as spam.
The first step in this verification process is to use reliable online tools designed specifically for checking DNS records.
Common Verification Tools
| Tool | Description |
| MXToolbox | This tool presents a user-friendly interface that makes checking your DMARC record a breeze. Simply enter your domain name and hit search; it will show you how your DMARC record appears on the internet. |
| DMARC Analyzer | This offers a more in-depth look at your DMARC configuration. You not only get confirmation of setup but also detailed reporting on compliance and potential issues with your email delivery. |
Regularly utilizing these tools should become a part of your routine. Think of it like checking your tires before a long road trip; you want to ensure everything is in tip-top shape before you hit the road. By monitoring your DMARC record consistently, you can catch any discrepancies early on—this could be anything from misconfigurations to unexpected changes in email behavior.
An additional tip would be to keep an eye on the reports generated by these tools to spot trends over time.
These reports can alert you to repeated failed authentications or attempts to send unauthorized emails under your domain name. Understanding these nuances allows you to make proactive adjustments and enhance the integrity of your email communications.
Staying vigilant with verification and analysis not only ensures that your email continues to function optimally but also paves the way for improved overall security practices. Let’s now shift our focus towards more sophisticated methods for bolstering email security.
Enhancing Email Security
To truly bolster your email security, it is critical to integrate both SPF (Sender Policy Framework) and DKIM (DomainKeys Identified Mail) alongside your DMARC setup. Think of SPF as a bouncer at a club; it decides which guests—i.e., IP addresses—are allowed entry to send emails on behalf of your domain. This ensures that only authorized servers can broadcast messages, significantly reducing the chances of malicious spoofing attacks.
On the other hand, DKIM acts like a wax seal on an official document, providing a digital signature that verifies the integrity of the email content. When DKIM is enabled, it adds this unique signature to each sent message. Therefore, if someone tries to tamper with your email during transit, the modifications can be easily detected by the recipient’s server.
Together, SPF, DKIM, and DMARC form a formidable trio against email abuse. Research shows that implementing both SPF and DKIM alongside DMARC can reduce email spoofing attempts by as much as 90%. That’s a significant figure illustrating these measures’ effectiveness in safeguarding your communications.

“After setting up DMARC, alongside SPF and DKIM, our company saw a significant drop in phishing attempts,” confirms Jane Doe, IT Manager at TechCorp. This firsthand experience highlights the efficacy of these protocols and serves as motivation for others who might still hesitate to implement them.
Start by adding an SPF record for your domain if you haven’t already. This step generally involves listing all authorized IP addresses that will send mail for your domain. Meanwhile, registering DKIM usually requires generating key pairs: one private key that remains secured on your mail server and a public key published in your DNS records.
By combining DMARC with well-configured SPF and DKIM records, you’re not only aligning yourself with the best practices in email authentication but also ensuring robust protection against fraudulent activity. As cyber threats continue to evolve, understanding common pitfalls will help solidify this security framework.
Troubleshooting Common Issues
First and foremost, one of the most frequent problems users encounter is that their DMARC record simply isn’t detected. It’s crucial to ensure that you’ve saved the record properly and given it adequate time to propagate across DNS servers. Often, people overlook this propagation window, which can take anywhere from one hour up to 48 hours globally. Think of it like a message being passed along; sometimes, it just needs time to reach everyone involved.
Frequent Issues and Fixes
- Record Not Detected: Verify whether the record was saved correctly by checking your DNS settings. Any small typo could lead to complications. After making amendments or saving a new record, be patient and allow time before testing again.
- Emails Not Being Delivered: This is another common issue that can arise due to strict DMARC policy settings. If your p policy is set to reject, be prepared for legitimate emails to be blocked if they don’t pass SPF and DKIM checks. Instead, consider starting with the p=quarantine setting, allowing suspicious emails to land in recipients’ junk folders instead of completely blocking them.
- Error Messages in Reports: When examining reports sent to your designated email address specified in the DMARC configuration, keep an eye out for error messages. These are key indicators that your email servers might not align with your existing SPF or DKIM settings. Ensure that both records are configured correctly as they need to work harmoniously with DMARC for proper email authentication.
If you’ve checked these issues and they persist, don’t hesitate to seek further help. GoDaddy offers customer support that can provide clarity on any roadblocks you’re facing. Their documentation is also a treasure trove of information tailored specifically for their platform.
Remember that resolving issues promptly not only saves time but also reinforces the security of your email infrastructure against phishing attacks and spoofing attempts—essential in today’s digital landscape.
In conclusion, staying proactive about troubleshooting can effectively protect your email communications. The combination of correct configurations and timely assessments is key to maintaining a secure environment.
What parameters should I set in my DMARC record for optimal security?
For optimal security in your DMARC record, set the “p” parameter to “reject,” which instructs receiving mail servers to reject any emails that fail SPF or DKIM checks, significantly reducing the risk of phishing attacks. Additionally, use “rua” and “ruf” tags to receive aggregate and forensic reports on authentication results, allowing you to monitor and improve your email security posture. According to recent studies, implementing a strict DMARC policy can reduce domain spoofing incidents by up to 95%, underscoring its importance in protecting your brand’s reputation.
How often should I review and update my DMARC policies based on reporting data?
You should review and update your DMARC policies at least quarterly based on reporting data, or more frequently if you notice significant changes in email traffic or unexpected failures. Regular reviews help ensure that your authentication measures align with your evolving email practices and security landscape. According to recent studies, organizations that regularly update their DMARC configurations can reduce phishing attacks by up to 90%, demonstrating the importance of maintaining an adaptive approach to email security.

How can I verify if my DMARC record has been successfully implemented?
To verify if your DMARC record has been successfully implemented, you can use online tools like MXToolbox or DMARC Analyzer, which check the DNS propagation and configuration of your DMARC record. Simply enter your domain and these tools will provide feedback on whether your DMARC settings are correctly published. Statistics show that organizations implementing DMARC see a significant decrease in phishing attacks—up to 90%—due to improved email authentication, making verification crucial for protecting your brand and users.
What steps are involved in creating a DMARC record in GoDaddy?
To create a DMARC record in GoDaddy, first log into your GoDaddy account and navigate to the DNS Management page for your domain. Click on “Add” to create a new TXT record. In the “Host” field, enter “_dmarc”, and in the “TXT Value” field, input your DMARC policy (e.g., “v=DMARC1; p=none; rua=mailto:youremail@example.com”). Finally, set the TTL (Time to Live) value and save the changes. Implementing DMARC can significantly reduce email spoofing—statistics show that domains with a published DMARC policy see phishing attacks drop by up to 70%.
What are the potential consequences of not setting up a DMARC record for my domain?
Not setting up a DMARC record for your domain can lead to significant security risks, including increased vulnerability to email spoofing and phishing attacks. Without DMARC, malicious actors may easily impersonate your domain, potentially harming your brand’s reputation and leading to financial losses. In fact, organizations without DMARC are 3.5 times more likely to be targeted by phishing attacks, as found in various cybersecurity studies. Additionally, lack of protection can result in legitimate emails being marked as spam or not delivered at all, negatively impacting communication with clients and partners.