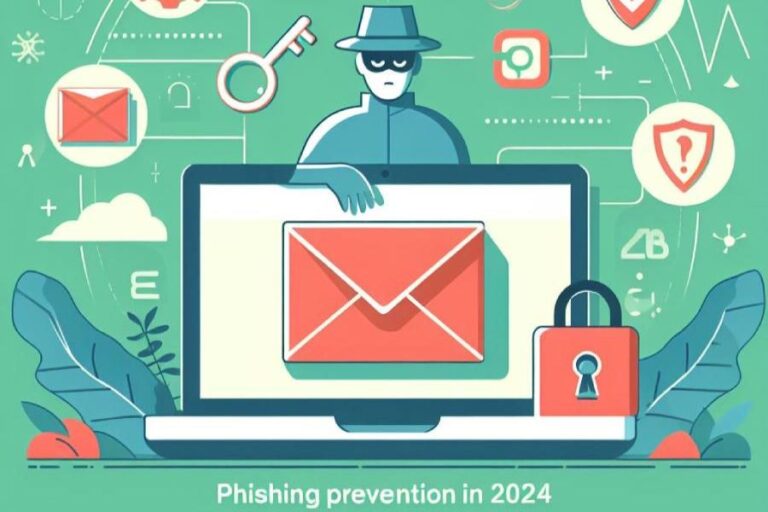
How to Add HubSpot SPF, DMARC, and DKIM for Email Authentication
Email authentication might sound like a technical term reserved for IT professionals, but it’s something we all need to consider if we want our messages to land safely in inboxes rather than get lost in spam folders. In an age where trust is hard-won and easily lost, knowing how to implement protocols like SPF, DKIM, and DMARC can set you apart. These measures not only protect your brand from email fraud but also enhance your communication with your audience.
After all, who hasn’t been frustrated when an important message ended up buried in junk mail? Understanding these tools can empower you to fortify your email strategies and foster better relationships with your subscribers. So let’s dive into the ins and outs of these vital practices.
To add SPF, DKIM, and DMARC records for HubSpot, start by accessing your DNS provider’s settings to create a TXT record for SPF including HubSpot’s sending domains. Then, add two CNAME records for DKIM authentication and create a TXT record for DMARC to specify your email policy; ensure that the entries align properly with existing records to maintain email deliverability.
Importance of SPF, DKIM, and DMARC for HubSpot
First, let’s explore Sender Policy Framework (SPF). This method essentially tells the world which email servers are permitted to send emails on behalf of your domain. Imagine SPF as a gatekeeper—it helps prevent spoofing or phishing attempts by only allowing authorized servers. If your SPF is not set up correctly, your emails risk being flagged as spam—think about that one time you eagerly awaited an important message that ended up in junk! This is why it’s crucial to maintain updated SPF records, especially since HubSpot often uses subdomains for sending out emails.
DKIM’s Impact
Now, when we transition to DomainKeys Identified Mail (DKIM), it’s akin to signing a letter in invisible ink. It adds a unique digital signature to your emails that recipients‘ servers can check to confirm those messages genuinely came from you and weren’t altered in transit. This verification significantly decreases the likelihood of being marked as spam.
For instance, imagine receiving a package but with no sender information—it would raise suspicions. Likewise, an email without DKIM lacks trust markers and could be misjudged by spam filters.

So how does this all come together with another method?
DMARC’s Added Layer
Enter **Domain-based Message Authentication, Reporting & Conformance (DMARC)**—the superhero of email authentication. DMARC operates by bringing together SPF and DKIM. By doing so, it provides reporting tools that allow you to track how effectively your emails are being authenticated across different systems.
When DMARC is configured properly, it not only enforces your SPF and DKIM policies but also offers insights through reports on email performance. This means if something goes awry, such as someone attempting to spoof your domain, DMARC will give you the heads-up.
And let’s not forget—the presence of DMARC significantly enhances your sender reputation, leading to better deliverability rates. You’re giving yourself proactive defenses against potential threats while ensuring your legitimate marketing efforts reach their intended recipients.
The combination of SPF, DKIM, and DMARC creates a robust framework for protecting your email communications. These measures build trust with your audience and help keep your messages from falling into that ever-dreaded spam folder—a concern we can all relate to when managing our digital reputations.
Equipped with these foundational concepts, we now turn our attention to the practical steps for adding an SPF record to enhance your email authentication setup.
Steps to Add SPF Record for HubSpot
Setting up SPF is straightforward but requires precise steps to ensure your marketing emails get delivered efficiently. The SPF (Sender Policy Framework) record acts as a safety net, telling other email servers that your domain is authorized to send emails on your behalf. This not only protects your reputation but also greatly enhances deliverability.
Step-by-Step Guide
The first step involves accessing your DNS provider’s dashboard where your domain’s records are managed. This could be GoDaddy, Namecheap, Cloudflare, or any other service you may use. To start this process, simply log into your account. Once you’ve done that, navigate to the section labeled ‘DNS Management’ or ‘DNS Records’. It varies slightly depending on the provider, but typically you can find it right on the main dashboard.
After gaining access, you’re ready to create the necessary TXT record to establish your SPF settings.

Step I – Access Your DNS
In the DNS management area, select the option to add a new record—this is usually a button marked ‘Add’ or ‘Create New Record’. At this point, you’ll be given options for different record types. For our purpose, we will choose TXT Record because SPF data is formatted as text.
Moving forward, once you’ve selected the correct record type, it’s time to fill in the required fields with precision.
Step II – Add a TXT Record
In the “Name” field of your new TXT record, enter your domain name exactly as it appears in your email address. For instance, if your email is support@example.com, you would enter “example.com” here. Next comes the “Value” field; this is where you’ll paste in the specific SPF record for HubSpot:
v=spf1 include:hs01._spf.hubspotemail.net -all
This form essentially tells other mail servers that only HubSpot’s servers are permitted to send emails on behalf of your domain. Remember to double-check for typos; mistakes at this stage can lead to deliverability issues later on.
Now that you’ve configured the SPF record correctly, it’s crucial to finalize everything you’ve set up so far.
Step III – Save Changes
Once all information is entered accurately, look for the option to save changes—this might appear differently across various platforms but generally follows a confirmation prompt asking if you’re ready to apply these settings. Click ‘Save’ or ‘Update’ and do take a moment to ensure these changes have been reflected in your DNS settings.
It’s important to note that changes made to DNS records can take some time to propagate across the internet; this process can take anywhere from a few minutes up to 48 hours. During this period, email functionality should remain intact as long as other settings are properly configured.
Following these steps closely sets a strong foundation for secure authentication of your HubSpot email communications.

As we transition from establishing SPF records, let’s now focus on the specifics of enhancing security further through an essential process involving another key authentication method.
DKIM Configuration Guide for HubSpot
Configuring DomainKeys Identified Mail (DKIM) might seem overwhelming at first glance, especially if you’re not familiar with technical jargon or DNS settings. However, it’s an essential step in ensuring your emails maintain their integrity and reach your recipients’ inboxes. By establishing a DKIM signature, you’re adding a layer of authentication that verifies the authenticity of your sending domain. This combats email spoofing and boosts your deliverability rates.
Step-by-Step Guide
Let’s break down the steps to configure DKIM into digestible portions to guide you through the process seamlessly.
Step I – Access Domains & URLs
First, log into your HubSpot account and navigate to the settings section. From the dashboard, go to Settings, then click on Website followed by Domains & URLs. Here you’ll find all the domains you’ve connected for sending emails. Make sure to select the specific domain you want to secure with DKIM.
With the proper domain selected, you are ready to generate your DKIM keys, which is crucial for validating your email communications.
Step II – Generate DKIM Keys
Under the Email Sending Domain section, look for and select the domain you wish to configure. Click on Generate DKIM Keys, and HubSpot will provide you with two unique DKIM keys that you’ll need to add to your DNS records. These keys create a digital signature for outgoing emails associated with that domain.
Now comes an important step: adding these keys to your DNS settings so they can be recognized by mail servers.
Step III – Add CNAME Records
After generating your DKIM keys, you will see instructions to add two CNAME records directly from HubSpot. Take note of this information; it typically includes the hostnames and values you need. Log into your DNS provider’s portal—this is where your domain’s DNS records are managed—and proceed to add these CNAME records as instructed by HubSpot. Inputting them exactly as shown is crucial; small discrepancies can lead to verification issues later.
Once you’ve successfully added the CNAME records, it’s time to confirm that everything has been done correctly by verifying those records in HubSpot.
Step IV – Verify Records
Return to HubSpot after you’ve added those CNAME records and click on the Verify button. HubSpot will check whether those records have been correctly configured in your DNS settings. Keep in mind that the verification process may take some time—sometimes up to several minutes—to reflect changes across Internet networks. Don’t be alarmed if it doesn’t happen instantaneously!
With DKIM set up correctly, you’re now addressing critical components of email authentication practices while moving forward to enhance security in your email communications.

How to Implement DMARC Policies
Implementing DMARC policies is crucial for any organization serious about email deliverability and security. At its core, DMARC (Domain-based Message Authentication, Reporting & Conformance) builds upon the foundations of SPF and DKIM, making it essential to ensure compliance with these authentication methods. In simpler terms, think of DMARC as an additional layer of protection that instructs receiving mail servers how to handle emails that fail authentication checks. This makes it both a proactive and reactive strategy that can enhance your email reputation.
Step-by-Step Guide
To implement DMARC correctly, follow some straightforward steps to safeguard your emails and provide you with insights through monitoring. Here’s how to get started:
Step I – Create a DMARC Record
When setting up DMARC, the first step is to create a new TXT record in your Domain Name System (DNS). Log into your DNS provider’s dashboard; this is where you manage your domain settings. Don’t be intimidated by the interface; it’s often quite user-friendly once you find the right section. Add a TXT record, which stores the information needed for verification.
Step II – Add Policy Details
Next, in the “Name” field of your new TXT record, enter _dmarc. This denotes that you’re configuring DMARC settings for your domain. The real magic happens in the “Value” field, where you’ll input something like:
v=DMARC1; p=none; rua=mailto:dmarc@yourdomain.com
Here’s the strategic part: adjust the “p” value according to your specific policy needs. Each option has different implications:
- none: Tells the receiving server to take no specific action on unverified emails but still sends reports.
- quarantine: Suggests that unverified emails should be treated as suspicious and possibly moved to spam.
- reject: The most aggressive choice; tells servers outright to reject any emails that fail authentication.
Selecting the right policy involves evaluating how comfortable you are with potential loss of emails versus protecting your domain from misuse.

Step III – Save and Monitor
Once you’ve got all your details entered correctly, save the changes in your DNS settings. After saving, it doesn’t end there—instead, this is just the beginning! Monitoring is vital. Keep an eye on the reports sent to the specified email address (e.g., dmarc@yourdomain.com). These reports help evaluate how well your implementation is performing and if there are adjustments needed.
Remember, implementing DMARC isn’t simply a task you can set and forget. Regularly review those reports for any signs of unauthorized access or strange activity related to your domain—doing so will further fortify your defenses against email spoofing or phishing attempts.
Executing these steps for DMARC implementation takes significant strides toward securing email communications and maintaining brand integrity.
With these foundational elements in place, it’s essential to be aware of potential setup challenges that might arise during implementation.
Common Setup Issues and Fixes
Even a small error can disrupt your email authentication process, but most issues can be quickly resolved if you know what to look for. The first issue many users encounter is SPF Record Not Authenticating. This often stems from tiny syntax errors lurking in the TXT record. One common mistake is neglecting to include all necessary components or misplacing characters.
To ensure proper SPF configuration, verify that your SPF record reads exactly like this:
v=spf1 include:hs01._spf.hubspotemail.net -all
It’s a simple string, but it’s crucial that each part is present and in the right order.
After addressing SPF, the next potential hurdle involves DKIM keys not verifying correctly.
This problem is typically caused by incorrect CNAME configurations. If your DKIM isn’t verified, double-check your CNAME values against those provided by HubSpot. It’s essential that they match exactly, as even a minor discrepancy can lead to failure in key verification.
Sometimes, users might set up their CNAME records but forget to remove irrelevant or outdated entries from their DNS settings, which can confuse email servers. Taking time to review these entries may lead to a quick resolution.

Once you’ve troubleshot SPF and DKIM, you might still find yourself scratching your head over DMARC reports not being received.
This particular issue often arises due to misconfigurations in the destination email address listed in your _dmarc TXT record. Make sure that the email address specified for receiving DMARC reports is correct and uses valid URI format; for instance, it should look like mailto:reporting@example.com.
Errors in formatting could mean you’re missing out on essential feedback about your domain’s email performance. If you notice still no reports coming through after making adjustments, it’s worth giving additional thought to any spam filters that might be catching those emails before they reach your inbox.
Dealing with these common setup issues does not have to be daunting. Instead, think of them as manageable challenges that enhance the security and integrity of your email communications.
Now that we’ve tackled some common challenges in setting up email authentication, let’s shift our focus to strategies designed to ensure your messages consistently reach their intended audience without getting lost in cyberspace.
Best Practices for Email Deliverability with HubSpot
Ensuring high email deliverability involves more than just technical configurations; it requires a comprehensive approach that combines authenticity, effective targeting, and nurturing relationships with your audience. One vital aspect of this is having a consistent “From” name and email address. When recipients see an email come from the same recognizable source, they are more likely to trust the correspondence and open it. This consistency builds rapport over time, making your emails feel familiar and thereby increasing engagement rates. Imagine receiving a letter from an acquaintance versus a stranger — the former naturally piques your interest.
Now, once you’ve established a consistent identity, it’s crucial to refine your audience.

Segment Your Email List
According to HubSpot, segmented email campaigns yield an impressive 14.31% higher open rate than their non-segmented counterparts. This statistic underscores the importance of engaging with your subscribers on a more personal level. By understanding who your recipients are and how they interact with your content, you can tailor your messages accordingly.
Segmenting your list based on factors like geographic location, past purchase behavior, or engagement levels allows you to deliver more relevant and timely emails. This approach isn’t just about improving metrics; it’s about fostering genuine connections.
And as you craft these personalized messages, it’s also important to pay attention to how you send them out.
Warm Up IP Addresses
When starting with a new IP address, it’s essential to warm it up. This means gradually increasing your sending volume over several days or weeks rather than launching straight into large mailing lists. Sudden bursts of activity can trigger spam filters and lead to blacklisting, which hampers deliverability. Picture introducing yourself to a room full of strangers; if you start shouting immediately, people may react negatively. Instead, take the time to establish your presence calmly before seeking deeper conversations.
To warm up effectively, begin by sending emails to your most engaged contacts who will likely open and interact with your emails—this sends positive signals that bolster your reputation. As engagement improves over time and your IP earns its stripes in the eyes of Internet Service Providers (ISPs), gradually scale up the volume of emails sent.
These measures are foundational steps in ensuring that your emails land where they belong—in inboxes instead of spam folders. With this groundwork laid, the next focus will be on maintaining visibility into how well these strategies are performing.
Monitoring Your Email Authentication Status
Keeping track of your email authentication status helps maintain credibility. This is vital not only for ensuring your messages reach your audience but also for protecting your brand from being associated with spam. Regularly monitoring your SPF, DKIM, and DMARC configurations can provide peace of mind, enabling you to catch any issues before they affect deliverability. HubSpot’s built-in tools make this process straightforward, allowing for easy tracking and management of these crucial elements.
Regular Monitoring
You don’t want to wait until a problem arises to check on your email configurations. Using HubSpot’s built-in tools, you can monitor the status of SPF, DKIM, and DMARC actively. These tools provide real-time status indicators, displaying whether each record is authenticated, partially authenticated, or not authenticated at all. When an issue occurs—such as a misconfigured DNS record—you’ll receive alerts right away. This proactive approach prevents delivery hiccups, which could impact your sender reputation adversely.
Think of it like checking your car’s oil before a long road trip. By keeping an eye on the finer details, you prevent larger problems down the line. It’s about keeping everything running smoothly so you can focus on crafting the perfect message rather than worrying about whether it will land in the spam folder.
Utilize DMARC Reports
Another aspect of effective email authentication management involves utilizing DMARC reports that are sent directly to your inbox. These reports provide valuable insights into who is sending emails on your behalf. Furthermore, they indicate whether those emails are passing authentication checks.
Addressing discrepancies immediately can help ensure that only authorized parties use your domain, safeguarding against phishing attempts that can undermine your credibility.
By consistently reviewing these reports, you’re essentially holding a mirror up to your email ecosystem. Are there any unexpected senders? Are legitimate emails facing rejection? These reports will guide you in making necessary adjustments to bolster both your deliverability and security measures.
For example, if you notice a significant number of failed authentication checks tied to a specific sender address that you recognize or work with regularly, it’s time to communicate with them and troubleshoot the issue directly. Perhaps they need to update their own records or policies to ensure better collaboration between both domains.
Ultimately, diligence in monitoring these key components will enhance not only your email deliverability but also trust and reliability in communications with your recipients. As you’ve now learned, keeping an eye out for any irregularities through HubSpot’s tools alongside regular DMARC report reviews lays a strong foundation for effective email marketing campaigns.
In summary, an active approach to managing email authentication not only secures communication but ensures that you remain engaged and trusted by your audience. Combine HubSpot’s resources with consistent monitoring for optimal results in your email marketing efforts.
How do these email authentication protocols enhance security for my email communications?
Email authentication protocols like SPF, DMARC, and DKIM significantly enhance security by verifying the sender’s identity and ensuring email integrity, reducing the risk of phishing attacks and spoofing. According to a report from Proofpoint, over 83% of organizations experienced email-based attacks in 2022. Implementing these protocols not only helps protect sensitive information but also boosts trust among recipients, as emails are less likely to be marked as spam when properly authenticated.
How can I test if my SPF, DMARC, and DKIM records are properly configured?
To test if your SPF, DMARC, and DKIM records are properly configured, you can use online tools such as MXToolbox or DMARC Analyzer, which provide in-depth analysis of your email authentication records. These tools allow you to input your domain and check for any misconfigurations or issues. In fact, studies show that proper email authentication can improve deliverability rates by up to 99%, significantly reducing the chances of your emails being marked as spam. Regular testing ensures that your emails reach their intended recipients securely and effectively.

What impact do these settings have on my email marketing performance through HubSpot?
Implementing SPF, DMARC, and DKIM for email authentication significantly enhances your email marketing performance through HubSpot by improving deliverability rates and reducing the risk of your emails being marked as spam. Emails with proper authentication are more likely to land in the inbox, with studies showing that businesses can see a 20% increase in open rates when these protocols are correctly configured. Furthermore, robust authentication lowers the chances of domain spoofing and phishing attacks, protecting your brand reputation and fostering greater trust among subscribers.
What common mistakes should I avoid when setting up SPF, DMARC, or DKIM records?
Common mistakes to avoid when setting up SPF, DMARC, or DKIM records include neglecting to include all sending domains in your SPF record, using too many DNS lookups (more than 10 can cause failures), and failing to monitor your DMARC reports regularly. These oversights can lead to email deliverability issues or even make your emails vulnerable to spoofing. Statistics show that organizations with well-configured DMARC policies experience up to a 70% decrease in phishing attacks targeting their domains. Always double-check your syntax and test your records before going live!
What are the steps involved in adding SPF, DMARC, and DKIM records for HubSpot?
To add SPF, DMARC, and DKIM records for HubSpot, first, log in to your domain registrar and locate your DNS settings. For SPF, add a record that includes HubSpot’s sending servers; it usually looks like “v=spf1 include:hubspot.com ~all“. For DKIM, generate the DKIM key in HubSpot and create a TXT record with the provided content.
Lastly, set up DMARC by creating another TXT record that specifies your policy (e.g., “v=DMARC1; p=none; rua=mailto:your_email@domain.com”). Implementing these records can significantly improve email deliverability, as according to statistics, emails authenticated with these protocols see up to 99% higher delivery rates compared to unauthenticated emails.