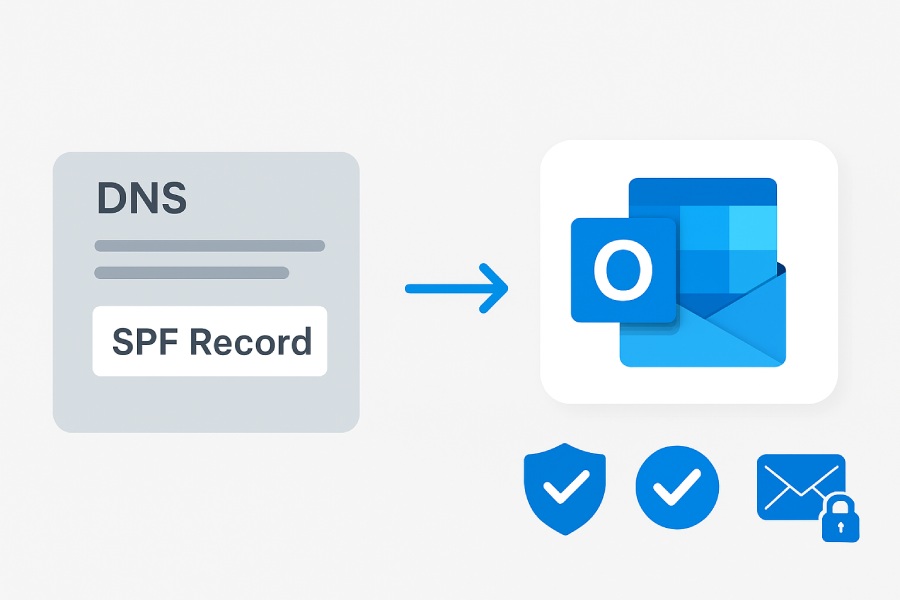
Adding SPF Records To Your Domain For Outlook Email Authentication
Adding SPF records to your domain is a crucial step in strengthening email security and ensuring proper authentication for Microsoft Outlook and Office 365 emails. SPF (Sender Policy Framework) records, published as DNS TXT entries, specify which mail servers are authorized to send emails on behalf of your domain. By enabling recipient servers to verify the legitimacy of incoming messages, SPF helps prevent email spoofing, phishing attacks, and unauthorized use of your domain, protecting both your organization and your recipients.
Proper SPF configuration directly impacts email deliverability and your domain’s sender reputation. Without it, legitimate emails may be flagged as spam, rejected, or blacklisted by security filters used by Outlook and other major email platforms. Implementing SPF records correctly ensures that your domain-aligned emails are trusted, supports other authentication protocols like DKIM and DMARC, and maintains smooth, secure communication across all email channels.
Understanding SPF Records and Their Importance
The Sender Policy Framework (SPF) is a critical component of email security protocols designed to combat email spoofing and enhance domain email security. An SPF record is a specialized DNS TXT record that specifies which mail servers are authorized to send email on behalf of your domain. By validating the originating sender via an SPF lookup, receiving mail servers—such as those used by Microsoft Outlook and Office 365 email—verify that incoming messages are legitimate and not malicious impostors attempting email fraud or phishing attacks.
SPF records play an indispensable role in email authentication, particularly in preventing email spoofing, where cybercriminals forge the sender’s address to deceive recipients. Proper TXT record configuration of SPF supports email sender verification to maintain the integrity of domain email. This directly impacts email deliverability and preserves your domain’s email sender reputation.
Without an accurate SPF record setup, your domain risks being flagged by email spam filters, blacklisted, or having legitimate messages marked as junk, thereby impairing communication workflows in platforms such as Microsoft Exchange Server, Google Workspace, and other major mail services.

How SPF Works in Email Authentication
SPF functions by publishing a list of approved mail servers in the domain’s DNS records. When an email is received—whether on Outlook 365, the Outlook web app, or the native Outlook client—the recipient’s mail server performs an SPF validation by querying the DNS TXT record for that domain. The SPF syntax in the record commonly includes mechanisms such as the SPF include mechanism to authorize third-party email senders, including bulk mailing services like SendGrid, Amazon SES, or Mailchimp.
The process involves:
- SPF lookup to identify the valid sending servers.
- Comparing the sender’s IP address with the authorized list.
- Returning an SPF result of SPF pass if the IP is authorized, or SPF fail if it is not.
This outcome informs further email security checks, often in conjunction with DKIM (DomainKeys Identified Mail) and DMARC (Domain-based Message Authentication, Reporting & Conformance) policies. Together, these mechanisms form a robust framework to improve email phishing protection, assist in email fraud detection, and enforce email policy enforcement on inbound and outbound mail.
Why Outlook Requires Proper SPF Configuration
As a leading email client, Microsoft Outlook relies heavily on SPF records as part of its multi-layer email security protocols. Outlook’s integration with Microsoft Exchange and Office 365 enforces strict validation of incoming messages to prevent spoofed emails from infiltrating the inbox. When SPF records are correctly configured, Outlook can verify the authenticity of domain-aligned emails through email header analysis and other verification techniques.
Without proper SPF setup, emails sent on behalf of your domain can trigger email blacklisting or get caught by sophisticated email spam filters administered by security vendors such as Proofpoint, Barracuda Networks, Cisco, and Trend Micro. Misconfigurations might cause legitimate messages to fail SPF checks, resulting in SPF fail responses that diminish your domain’s overall email deliverability. This is particularly critical for organizations using bulk email authentication services or third-party email senders, where strict SPF record validation ensures only trusted servers relay mail on your behalf.
Moreover, Outlook and Outlook 365 environments often depend on SMTP authentication and properly aligned email DNS records to maintain overall domain integrity. Thus, a correctly configured SPF record complements other email security best practices, such as implementing DKIM and DMARC, to build a comprehensive defense against phishing attacks and email spoofing attempts.

Prerequisites Before Adding SPF Records to Your Domain
Before proceeding with the SPF record setup specifically catered for Outlook email authentication, it’s essential to consider several prerequisites:
- Administrative Access to DNS Management: You need access to your domain’s DNS management console, whether hosted through providers like Cloudflare, GoDaddy, or your in-house DNS servers.
- Inventory of Authorized Mail Servers: Compile a list of all mail servers that send emails for your domain. This includes Microsoft Exchange servers, Office 365 email services, third-party senders like SparkPost, Agari, or marketing platforms such as Zoho Mail.
- Understanding of Existing Email Security Protocols: Be familiar with your current email authentication implementations including DKIM and DMARC records to ensure SPF integrates seamlessly.
- SPF Record Constraints: Keep in mind SPF records have a lookup limit (10 DNS queries maximum). Excessive uses of the SPF include mechanism require careful planning to avoid SPF validation failures.
- Backups and Testing Tools: Before making changes live, use SPF record checker tools provided by vendors like DMARC Analyzer or Valimail to validate your SPF syntax and ensure no configuration errors that might lead to email deliverability issues.
Step-by-Step Guide to Creating SPF Records for Outlook
Creating an SPF record involves carefully crafting a DNS TXT record that accurately declares the permitted mail servers authorized to send mail for your domain. Below is a detailed guide tailored for Outlook email authentication:
- Identify Your Sending Servers: For Outlook and Office 365 users, include the respective Microsoft mail servers. Microsoft recommends the following SPF syntax for Office 365 users:
- `v=spf1 include:spf.protection.outlook.com -all`
- Construct Your SPF Record Syntax:
- Start with `v=spf1` to indicate the SPF version.
- Use the include mechanism for Microsoft servers (`include:spf.protection.outlook.com`) and any third-party senders like `include:sendgrid.net` for SendGrid or `include:amazonses.com` for Amazon SES.
- End with an SPF all mechanism qualifier, usually `-all` to indicate a hard fail for unauthorized senders.
- Access Your DNS Management Panel: Log into your domain registrar or DNS provider such as Cloudflare or internal DNS management system.
- Add a New TXT Record:
- Type/Name: Enter `@` or your domain name to apply the record at the root level.
- Type: Select `TXT` record.
- Value: Paste your SPF record string.
- TTL: Set default or customized TTL as per your DNS provider’s recommendation.
- Save and Publish the Record: Ensure that you commit and publish changes to make the SPF record live globally.
- Perform SPF Lookup and Validation: Use an online SPF record checker or command-line tools to verify record correctness. Confirm a successful SPF pass result by sending test emails to Outlook inboxes and reviewing the email headers for SPF validation status.
- Monitor Email Deliverability and Security: Employ tools such as DMARC Analyzer to monitor ongoing SPF validation results, detect any unauthorized senders, and prevent potential email spoofing or phishing attacks.
- Maintain and Update as Needed: Regularly review your SPF record especially when deploying new mail servers, adding third-party email services like SparkPost, or changing cloud email platforms. This vigilance ensures continuous alignment with email domain alignment best practices, supporting top-tier email sender reputation.

By following these steps, organizations achieve robust SPF record setup that supports email fraud detection and complements existing email authentication layers, mitigating risks across Microsoft Outlook and Office 365 environments while enhancing overall domain email security.
How to Add SPF Records to Your Domain DNS Settings
Implementing Sender Policy Framework (SPF) is a foundational step toward enhancing your domain email security and preventing email spoofing. The SPF record is published as a DNS TXT record within your DNS management console, such as Cloudflare or your domain registrar’s DNS panel. When you intend to authorize Microsoft Outlook, Office 365, or third-party email senders like SendGrid, Amazon SES, or Mailchimp to send emails on behalf of your domain, you must specify them in the SPF record setup through correct SPF syntax.
To add an SPF record, follow these general steps:
- Access your DNS Management Console: Login to your DNS provider (e.g., Cloudflare, GoDaddy, or Google Workspace DNS Management).
- Create a TXT Record: Add a new TXT record to your email DNS records with the hostname set to your root domain or “@” symbol indicating the primary domain.
- Compose the SPF Record String: Use the SPF include mechanism to add authorized senders. A typical SPF record might be:
- v=spf1 include:spf.protection.outlook.com include:sendgrid.net -all
- Here, `v=spf1` denotes the SPF version, followed by include mechanisms that authorize Microsoft Exchange Online Protection (Office 365 email), SendGrid, or other bulk email authentication providers. The `-all` mechanism enforces a hard fail for unauthorized sources.
- Save and Publish: After entering the SPF record string, save the configuration. DNS propagation usually completes within minutes but may take up to 48 hours.
Proper SPF record setup is crucial for email deliverability, reducing the likelihood of your domain being flagged by email spam filters or email blacklisting services like Barracuda Networks or Trend Micro.

Common Mistakes to Avoid When Setting Up SPF for Outlook
While configuring SPF records, certain errors can undermine email authentication and cause SPF fail issues, leading to email rejection or placement in spam:
- Overly Permissive `+all` Mechanism: Using `+all` allows all mail servers to send on your behalf, defeating email spoofing prevention. Instead, implement strict mechanisms like `-all` or `~all`.
- Multiple SPF Records: DNS standards mandate that only one SPF TXT record exists per domain. Multiple records lead to SPF validation failures in Microsoft Outlook and other clients.
- Missed Third-Party Senders: Omitting third-party email senders such as SparkPost or Zoho Mail from SPF include mechanisms results in SPF fail during email header analysis or SPF lookup.
- Incorrect SPF Syntax: Typos or incorrect usage of mechanisms (e.g., forgetting to add `v=spf1` at the start) cause invalid SPF records that fail SPF validation tools and email security protocols.
- Ignoring Bulk Email Authentication Needs: Services sending bulk emails require proper inclusion in SPF records. Overlooking these can cause Office 365 email and Microsoft Exchange emails to be flagged.
- Lack of Coordination with DKIM and DMARC: SPF alone does not offer comprehensive email phishing protection. Aligning SPF with DKIM and DMARC policies strengthens email sender verification and policy enforcement.
Avoiding these pitfalls ensures robust domain email security and improves overall email sender reputation, enhancing Outlook email performance.
Testing and Verifying Your SPF Record Configuration
After SPF record setup, validating the configuration is essential to confirm that SPF passes for legitimate senders and fails for unauthorized sources. Use SPF lookup tools such as DMARC Analyzer, SPF record checker from Valimail, or public tools like MXToolbox. These utilities perform an SPF syntax check, TXT record configuration verification, and simulate SPF validation against your domain.
Steps for testing:
- SPF Syntax Validation: Check if your SPF record adheres to SPF protocol standards.
- SPF Lookup: Query your domain to retrieve the DNS TXT record and ensure the correct SPF string is returned.
- Send Test Emails: Send emails from authorized sources to Microsoft Outlook or Gmail clients and analyze email headers for SPF pass status.
- Monitor SPF Failures: Analyze failed SPF validations using email header analysis tools; a failed SPF result may be marked as `SPF fail` or `softfail`.
In organizations utilizing Microsoft Exchange Server or Outlook 365, integration with email security gateways like Proofpoint or Agari can provide advanced SPF validation and email fraud detection, increasing protection against email spoofing.

Troubleshooting SPF Issues in Outlook Email Delivery
When SPF fails or SPF pass does not occur as expected, it can result in bounced mails, email blacklisting, or placement in the junk mailbox. Troubleshooting involves multiple steps:
- Review SPF Record for Syntax Errors: Utilize SPF record checker to identify syntax issues or missing SPF mechanisms.
- Confirm Inclusion of All Authorized Senders: Verify that all mail servers using SMTP authentication, including third-party senders, are included via the SPF include mechanism.
- Email Header Analysis: Use Outlook client or Outlook web app to inspect email headers for SPF results. Look for `Received-SPF` field indicating `pass` or `fail`.
- Check DNS Propagation: Ensure recent DNS TXT record changes have fully propagated.
- Verify Email Domain Alignment: SPF results must align with your domain in Microsoft Outlook and Office 365 email configurations, especially when using multiple domains.
- Coordinate with DKIM and DMARC: An SPF pass alone may not suffice; misalignment in DKIM or DMARC can cause email rejection.
- Consult Email Security Gateways: Cisco, Mimecast, Barracuda Networks, and Trend Micro provide tools that can identify SPF-related errors and deliver actionable insights.
Effective troubleshooting improves email deliverability and mitigates risks related to email phishing attacks and spoofing.
Best Practices for Maintaining and Updating SPF Records
SPF record maintenance is an ongoing task. Email environments evolve frequently, requiring updates to your SPF DNS TXT record to maintain effectiveness:
- Regularly Audit Authorized Senders: Review your SPF record periodically to remove obsolete or unused third-party senders and add new ones.
- Prioritize SPF Record Length: DNS TXT records must stay within the 512-byte DNS response size limit to avoid truncation during SPF lookup.
- Use the `include` Mechanism Efficiently: Rather than listing multiple IP addresses, include SPF records of bulk email services or platforms like Microsoft Exchange or Google Workspace.
- Monitor Email Deliverability and Blacklisting: Employ services such as DMARC Analyzer or Agari for ongoing email policy enforcement.
- Align with DKIM and DMARC: Combine SPF with domainKeys identified mail (DKIM) and DMARC for comprehensive email security protocols.
- Manage SPF Record Carefully When Using Multiple Domains: Ensure SPF policies correspond with domain email security and Do not introduce conflicting configurations.
- Implement Testing After Changes: After any update to SPF records, perform an SPF validation and sender verification using SPF record checkers.
Adhering to these email security best practices strengthens protection against email spoofing, enhances email sender reputation, and ensures smooth email functionality across Outlook 365, Gmail, and other platforms.
FAQs
How do I know if my SPF record is correctly set up for Outlook email?
You can use SPF lookup tools such as MXToolbox or DMARC Analyzer to retrieve and validate your domain’s SPF TXT record. Additionally, analyzing email headers in Microsoft Outlook or Outlook web app for `Received-SPF` with `pass` confirms proper setup.
Why am I getting SPF fail results despite setting up my SPF record?
SPF fail typically occurs due to syntax errors in SPF records, missing include mechanisms for third-party email senders, multiple SPF TXT records existing simultaneously, or DNS propagation delays. Verify your SPF record with a checker and confirm all authorized mail servers are included.

Can SPF alone protect against all phishing attacks?
No. While SPF significantly helps prevent email spoofing by verifying sender IPs, it should be combined with DKIM and DMARC policies for comprehensive email phishing protection and email fraud detection.
How often should SPF records be updated?
Regular reviews every 3 to 6 months are recommended, especially if you change email service providers, add bulk email platforms like Mailchimp, or reconfigure mail server settings in Microsoft Exchange or Office 365.
What happens if I have multiple SPF records in DNS?
Having multiple SPF records violates SPF specifications and causes SPF validation failures, leading to potential email deliverability issues in Microsoft Outlook and other clients. Consolidate into one SPF DNS TXT record.
Does Office 365 email require a specific SPF include mechanism?
Yes. For Office 365 email, include `spf.protection.outlook.com` in your SPF record to authorize Microsoft Exchange Online Protection servers properly.
Key Takeaways
- Proper SPF record setup using the correct DNS TXT record format enhances domain email security and prevents email spoofing.
- Avoid common mistakes such as multiple SPF records or incorrect SPF syntax to reduce SPF fail incidents in Microsoft Outlook.
- Regular testing, SPF lookup, and email header analysis help verify SPF record accuracy and ensure email deliverability.
- Coordinate SPF with DKIM and DMARC for robust email security protocols and phishing attack mitigation.
- Maintain and update SPF records periodically, including all authorized senders and optimizing with include mechanisms, to sustain a strong email sender reputation.