DKIM TXT Records: How to Properly Configure Your Email Authentication
In an age where emails are the lifeline of communication, ensuring their authenticity has become more crucial than ever. Have you ever wondered how to keep your valuable messages safe from snoopers and fakes? Enter DKIM, or DomainKeys Identified Mail—an advanced layer of security designed to protect your email correspondence. Think of it as a sturdy lock on your digital mailbox, preventing unauthorized access while letting trusted senders in with ease.
In this article, we’ll walk through the nuts and bolts of DKIM TXT records and why configuring them properly not only safeguards your messages but also helps maintain your reputation online. Whether you’re a small business owner or just someone wishing to keep personal emails secure, understanding DKIM can empower you to communicate confidently.
DKIM TXT records are DNS records used in DomainKeys Identified Mail (DKIM) to authenticate emails, allowing the receiving server to verify that the email content was not altered in transit. To create a DKIM TXT record, you need to generate a public-private key pair, format the public key into a DKIM TXT record with specific attributes including your selector, and then publish it in your domain’s DNS settings.
What is DKIM?
DKIM, or DomainKeys Identified Mail, serves as a digital shield, enhancing the security and authenticity of your email communications. This email authentication method allows senders to sign their messages with a cryptographic signature, which can then be verified by the recipient’s mail server. Essentially, it is a way for you to tell the world, “Yes, this email comes from me!” and not from someone pretending to be you.
The concept behind DKIM arose in response to rampant issues with email spoofing and phishing attacks that plague online communication. With these threats on the rise, businesses quickly adopted DKIM to ensure that their emails reach inboxes without raising suspicion or being filtered out as spam. Imagine the confidence that it provides—like having an armored car for your important communications.
DKIM provides assurance to recipients that the message has not been altered in transit and truly originates from the stated sender.
In practical terms, once an email is sent, a unique cryptographic signature generated by the sender’s private key is attached to it. The receiving mail servers then check this signature against the public key published in the sender’s DNS records—much like verifying someone’s identity through a government-issued ID. If everything aligns, both parties can feel secure in their communication.

Think of DKIM as placing a wax seal on a letter—the kind that guarantees authenticity. When you receive that letter, you know it wasn’t casually opened and tampered with by someone else along the way. This layer of security is crucial in maintaining trust in our increasingly interconnected world.
It’s important to note that while DMARC (Domain-based Message Authentication, Reporting & Conformance) and SPF (Sender Policy Framework) work in tandem with DKIM, each plays a distinct role within overall email security protocols. Understanding how all three methods interact ensures comprehensive protection against fraud and malicious attempts to compromise your communications.
As we shift focus towards how DKIM contributes significantly to bolstering email security, we’ll uncover its vital role in safeguarding your online communications.
How DKIM Enhances Email Security
DKIM, or DomainKeys Identified Mail, plays a vital role in authenticating email senders and reducing fraudulent activities like email spoofing. By utilizing DKIM, organizations can ensure that the emails they send are verified and linked back to their domains. This means that if a malicious actor tries to send an email that seems to come from your bank, without DKIM, it would be easy for them to create a convincing façade pretending to be legitimate. Imagine receiving an email that looks shockingly similar to one your bank usually sends—without DKIM, there’s little stopping this kind of deception.
In fact, according to Cisco, implementing DKIM can reduce the risk of email spoofing by up to 90%, making it clear how critical it is in the fight against phishing attacks. That staggering statistic highlights how much protection this technology provides. It’s not just about preventing misrepresentation; it’s about safeguarding users and clients from potential loss and confusion.
Moreover, DKIM shines brightest when paired with other authentication methods like SPF (Sender Policy Framework) and DMARC (Domain-based Message Authentication Reporting and Conformance). Each of these tools plays a distinct yet complementary role in fortifying your email security. For example, while DKIM verifies whether an email comes from the stated domain, SPF checks that the sending server has permission to send emails on behalf of that domain. Together, these technologies create a multilayered defense system.
When these elements combine—DKIM verifying message integrity, SPF granting authorization for the sending server, and DMARC providing instructions for handling unauthenticated mail—the result is a powerful deterrent against unsolicited emails.
This layered defense structure instills confidence in users and enhances overall deliverability rates of genuine emails. Organizations deploying strong email authentication measures often see higher open rates as customers trust communications more readily.
Implementing DKIM alongside SPF and DMARC is not just advisable but essential for protecting both your reputation and your stakeholders’ trust. With this foundation laid, we are now set to explore the next step in enhancing your email security: creating DKIM keys.

Generating DKIM Keys
Generating DKIM keys involves creating a public-private key pair, which might sound daunting at first but becomes straightforward once you understand the process. The first step is selecting a DKIM selector. This selector acts as a beacon, helping the receiving server locate your public key in DNS records. Organizations typically adopt a naming convention that includes dates or specific identifiers, such as “jan2025,” making it easier to manage and rotate keys. This approach creates a clear structure that helps maintain organization and security over time.
Now that you’ve selected an appropriate DKIM selector, the next step is to generate your key pair.
Steps to Generate DKIM Keys
For the second step, generate the key pair. This is where tools like OpenSSL come into play. Using OpenSSL, you can execute a command in your terminal:
openssl genrsa -out private.key 2048
This command will generate a 2048-bit RSA private key. It’s essential to use at least 2048 bits since shorter keys may not provide adequate security against modern threats. After generating the private key, you can extract the corresponding public key with another command:
openssl rsa -in private.key -pubout -out public.key
This two-step process ensures that you have both keys ready for secure email signing.
After generating your keys, the next focal point is the security of your private key.
Step III – Store the Private Key
Once you’ve generated your key pair, it’s crucial to store your private key securely. This private key will be used later to sign outgoing emails and must remain confidential at all times—imagine it as the password to a precious vault. Keeping it safe from unauthorized access is imperative; if anyone gains access to that private key, they could easily forge emails appearing to come from your domain, jeopardizing your reputation and security. Implementing best practices like only storing it in encrypted formats and limiting access based on roles within your organization can significantly mitigate risks.

With a focus on safeguarding your keys established, let’s turn our attention to how these records are incorporated into DNS settings for proper function.
Adding DKIM Records to DNS
The importance of properly adding DKIM records cannot be overstated. A well-configured DKIM record helps safeguard your emails from being marked as spam and boosts the credibility of your domain with email service providers. This section will guide you through the process in clear, manageable steps.
Step I – Access Your DNS Management Console
To initiate the setup, log into your DNS management console. Popular platforms such as Cloudflare or GoDaddy are common choices. Once you’re logged in, navigating to your domain’s DNS settings is usually straightforward; you’ll find an option labeled ‘DNS’ or ‘Manage DNS.’
Taking a moment to familiarize yourself with the layout of your console can save time later; every interface may look slightly different.
Step II – Create a New TXT Record
After accessing the DNS settings, the next step is creating a new TXT record. This action serves as a crucial link between your emails and the DKIM verification process. In your DNS management panel, select the option to Add a New Record. When prompted for a hostname, structure it as your unique selector followed by ._domainkey. For example, if your selector is jan2025, you will enter jan2025._domainkey.yourdomain.com.
Make sure you double-check that you’re using the correct selector because any mismatch could lead to validation failures down the line.
Step III – Include the Public Key
With your TXT record created, paste your public key into the record’s value field. This requires careful attention—ensure that what you include starts with “v=DKIM1; k=rsa; p=”. The structure must adhere strictly to DKIM standards; otherwise, it won’t function correctly.
Once you’ve accurately entered everything, don’t forget to hit ‘Save’ before exiting. After saving, it’s essential to remember that changes made within DNS records may take some time to propagate across the internet. This period typically ranges from a few minutes up to 48 hours, so patience is necessary while waiting for changes to take effect.
As you proceed with these configurations, utilizing verification tools will ensure that everything is set up correctly before testing the effectiveness of your email authentication process.

Verifying DKIM Setup
Verifying your DKIM setup is akin to checking the locks on your doors after you’ve installed them – it gives you peace of mind that everything is secure. A correctly configured DKIM enables email receivers to verify that an email claiming to come from your domain is indeed authorized by you.
If there’s a mistake in your setup, the potential for unauthorized users to spoof your emails, leading to phishing attacks, becomes alarmingly high.
One effective way to validate your configuration is by utilizing online verification tools such as MXToolbox or the DKIM Core Validator. When you input your domain name and associated selector into these tools, they perform a DNS query to fetch your DKIM public key. This allows you to confirm that the public key published in your DNS matches the private key used to sign outgoing messages.
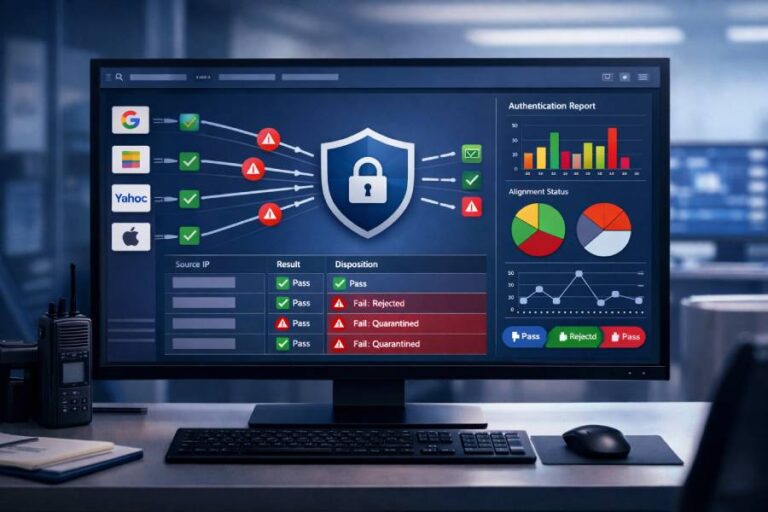
It’s important to remember that DKIM verification results can vary; common outputs include “Pass,” “Fail,” “Neutral,” or “None.” A “Pass” indicates that everything is in order and your emails are signed and verified. A “Fail” could mean issues like incorrect key format or missing records.
Once you have run these checks, it’s well worth spending some time reviewing the different messages generated, particularly focusing on any error messages returned by these tools.
If you receive a negative result, it’s essential to drill down on the specifics. For example, if the tool reports “No DKIM record found,” it may be due to a simple typographical error in your DNS entry or perhaps because of propagation delays—typically taking about 24-48 hours after making changes for updates to fully take effect.

Additionally, another point worth considering is the percentage of email providers that support DKIM; over 90% do, including major players like Gmail, Yahoo, and Outlook. Knowing this can give you confidence in using DKIM as part of your overall email authentication strategy.
As a final tip: it’s beneficial to routinely check your DKIM setup every few months even if things seem fine initially. The dynamics of email servers can change, and keeping an eye on these configurations will ensure continued protection against spam and phishing attempts while maintaining your domain’s reputation.
With a solid understanding of how DKIM functions in securing your emails, it’s essential now to explore some frequent challenges users face during configuration.
Common DKIM Configuration Issues
Among the many steps involved in setting up DKIM, there are recurring issues that can trip up even seasoned users. Understanding these challenges not only saves crucial time but also ensures a more secure email environment. One prevalent problem stems from incorrect TXT record syntax. It’s paramount that your DKIM records adhere strictly to the required formats; for instance, a proper record should look like v=DKIM1; p=your_public_key. Missing quotation marks or incorrect placements of semicolons are surprisingly easy mistakes to make and can prevent your DKIM settings from being recognized by DNS servers.
Equally important to consider are DNS propagation delays. After you make changes to your DKIM records, it can take up to 48 hours for these updates to fully propagate across the internet. Therefore, if you’ve recently tweaked your settings and aren’t seeing immediate results, patience is key here. It’s best practice to check back repeatedly over a day or two rather than rushing into further adjustments, which could complicate matters more.
In another common error, a mismatched selector often causes headaches for users. The selector specified within your email headers must precisely align with the one you’ve published in DNS settings. If they don’t match, mail servers will struggle to authenticate your messages properly, leading them either to be marked as spam or rejected outright. Double-checking both sets of information before sending an email can save you from potential delivery issues.

Addressing these three issues—correcting your TXT record syntax, being patient during DNS propagation, and ensuring your selectors match—is vital for successful DKIM implementation. However, this isn’t an exhaustive list of concerns; remaining vigilant throughout the configuration process helps prevent accidental missteps that may compromise email security.
What happens if you continue to face challenges even after verifying all of the above? It’s worth considering reaching out to support services like MXToolBox or checking tools such as NsLookup.io to gain additional insights into your DNS queries and records. These resources can help diagnose any lingering issues and guide you toward successful configuration implementation while keeping your email communication safe and reliable.
As we explore further, it’s important to understand how DKIM works in tandem with other email authentication methods to enhance security effectively.
DKIM with SPF and DMARC
At its core, DKIM (DomainKeys Identified Mail), SPF (Sender Policy Framework), and DMARC (Domain-based Message Authentication, Reporting & Conformance) form a triad of security measures that work together to protect your email domain from being exploited by malicious actors. While DKIM employs cryptographic signatures for validation of the sender’s authenticity, SPF adds another layer of defense by specifying which mail servers are authorized to send emails on behalf of your domain. This dual approach is critical; having either alone can potentially leave vulnerabilities that hackers may easily target.
SPF Overview
The SPF record serves as a protocol designed to prevent spammers from sending messages on behalf of your domain. To implement SPF, you create a specific DNS record that outlines which IP addresses or domains are authorized to send emails for your domain. You might think of it as a guest list: only those on the list get in. Therefore, if an email arrives claiming to be from your domain but originates from an unrecognized server, it will likely be flagged as spam or outright rejected by the receiving server.

Moving beyond SPF, we introduce DMARC, which builds on the frameworks established by both DKIM and SPF.
Setting Up DMARC
DMARC enhances the security landscape further by allowing domain owners to dictate policies on how emails failing authentication checks should be handled. When you set up a DMARC record as a TXT entry in your DNS, you essentially instruct email receivers on whether to reject, quarantine, or ignore suspicious emails claiming to originate from your domain. This not only strengthens the integrity of your communications but also provides valuable feedback loops via reports on who is sending emails using your domain.
To grasp the differences and synergy among these three protocols better, let’s take a closer look at their features.
Comparing DKIM, SPF, and DMARC
| Feature | DKIM | SPF | DMARC |
| Validation Method | Cryptographic Signature | IP Address Authorization | Policy Enforcement |
| Protection Against | Email Spoofing | Unauthorized Senders | Both SPF and DKIM Failures |
| Configuration Complexity | Moderate | Low | High |
| Implementation Time | Moderate | Quick | Moderate |
Each of these protocols offers unique advantages tailored to enhance your overall email security landscape. However, simply having them configured isn’t enough; regular updates and monitoring ensure they continue to serve their intended purpose effectively.
As we explore further aspects of email security practices, we’ll discover essential tools designed to validate these configurations and ensure optimal performance.
Tools for DKIM Validation
Several tools can streamline the process of validating and monitoring your DKIM settings, ensuring everything functions as it should in your email environment. These tools help quickly identify any issues with your DKIM configuration, keeping your emails safe from tampering and misdirection.

Recommended Tools:
- MXToolbox: This tool is a go-to for anyone needing comprehensive DKIM validation. With its easy interface, you can enter your domain and quickly receive diagnostics that reveal if your DKIM record is functioning properly. The best part? You’ll also gain insights on how to correct any errors detected.
- DKIM Core Validator: If you’re looking for something more detailed, the DKIM Core Validator fits the bill perfectly. It provides thorough insights into every element of your DKIM records, helping ensure that they meet defined standards. A user-friendly interface makes it suitable even for those not technically inclined.
- Google Postmaster Tools: A fantastic resource for those who send mass emails, Google Postmaster Tools allows you to track email performance specifically for messages sent to Gmail addresses. This tool provides valuable data surrounding delivery rates and user engagement, which can indicate how effectively your DKIM records are working.
Each of these tools offers unique features catering to different needs, and experimenting with them can yield a better understanding of the nuances in DKIM validation. In addition, these tools not only verify whether your DKIM records are correctly set up but also assist in ongoing maintenance by providing alerts or insights whenever something appears amiss.
As we explore using these tools effectively, remember that knowing how to properly set up and configure DKIM records significantly bolsters your email security while helping you stay one step ahead of potential vulnerabilities.
Incorporating the right tools into your email authentication strategy will enhance both security and deliverability, ensuring your communications remain secure and effective.
What role do DKIM keys play in ensuring email integrity?
DKIM keys play a crucial role in ensuring email integrity by allowing the sender to attach a digital signature to their emails, which is verified by the recipient’s server against the sender’s public DKIM key published in their DNS records. This process ensures that the email content has not been altered during transit and confirms the authenticity of the sender. Research indicates that implementing DKIM can reduce email spoofing by up to 80%, significantly enhancing overall email security and trustworthiness.
What common mistakes should be avoided when configuring DKIM TXT records?
When configuring DKIM TXT records, common mistakes to avoid include incorrect selector usage, formatting errors in the DKIM record, and failing to align DKIM signatures with the sending domain. For instance, using an incorrect selector can prevent email servers from locating the public key for verification, while formatting issues can lead to invalid records that will not authenticate properly. Statistics show that nearly 40% of email authentication failures are related to these misconfigurations, underscoring the importance of precision in setting up DKIM records for effective email validation.

How can you troubleshoot issues related to DKIM signing and verification?
To troubleshoot issues related to DKIM signing and verification, start by checking the DNS TXT record for accuracy—confirm that the public key is correctly published and that there are no typos. Utilize tools like DKIM testing websites to validate your setup; research indicates that nearly 20% of email fails authentication due to misconfigurations. Additionally, ensure your mail server’s keys match the ones in the DNS and verify that outgoing emails include the correct DKIM-Signature header. Regularly monitoring bounce reports can also help identify patterns in DKIM failures, allowing for timely corrections.
How does DKIM interact with other email authentication protocols like SPF and DMARC?
DKIM, or DomainKeys Identified Mail, works in conjunction with other email authentication protocols like SPF (Sender Policy Framework) and DMARC (Domain-based Message Authentication, Reporting & Conformance) to enhance email security. While SPF verifies the sender’s IP address against a list of authorized sending servers, DKIM adds a digital signature to the message header that validates the content’s integrity.
DMARC builds on both by allowing domain owners to instruct email providers on how to handle messages that fail DKIM or SPF checks, thereby reducing phishing attacks. Studies show that implementing DKIM along with SPF and DMARC can decrease email spoofing by up to 90%, greatly improving overall email deliverability and trustworthiness.
How do you set up DKIM TXT records for your domain?
To set up DKIM TXT records for your domain, first generate a DKIM key pair using a tool or through your email service provider. This will produce a public and private key where the public key is added as a TXT record in your domain’s DNS settings, typically formatted as “default._domainkey.yourdomain.com” with the value being the public key string. The private key remains secure on your mail server, ensuring that outgoing emails are signed appropriately. Implementing DKIM can improve email deliverability by up to 30%, reducing the chances of your messages landing in spam folders and enhancing overall email security.


