Setting SPF, DKIM, and DMARC for Omnisend

Quick Answer
DMARC (RFC 7489) ties SPF and DKIM together by requiring alignment between the envelope sender and the visible `From` header. According to Google's February 2024 bulk sender requirements, a DMARC policy of at least `p=none` is now mandatory for any domain sending 5,000+ messages per day to Gmail users.
Related: Free DMARC Checker ·How to Create an SPF Record ·SPF Record Format
Try Our Free DMARC Checker
Validate your DMARC policy, check alignment settings, and verify reporting configuration.
Check DMARC Record →
DMARC (RFC 7489) ties SPF and DKIM together by requiring alignment between the envelope sender and the visible From header. According to Google’s February 2024 bulk sender requirements, a DMARC policy of at least p=none is now mandatory for any domain sending 5,000+ messages per day to Gmail users.
DKIM is the authentication protocol that survives email forwarding, says Brad Slavin, General Manager of DuoCircle. When SPF fails because a forwarder’s IP isn’t in the original record, DKIM alignment is the only path to DMARC pass. That’s why we monitor DKIM alongside SPF in every DMARC Report dashboard.
DMARC Report
Setting SPF, DKIM, and DMARC for Omnisend
<button title="Play" aria-label="Play Episode" aria-pressed="false" class="play-btn">
Play Episode
					</button>
					<button title="Pause" aria-label="Pause Episode" aria-pressed="false" class="pause-btn hide">
Pause Episode
					</button>


					<audio preload="none" class="clip clip-19909">
						<source src="https://media.mailhop.org/dmarcreport/images/2025/01/Setting-SPF-DKIM-and-DMARC-for-Omnisend.mp3">
					</audio>


							<button class="player-btn player-btn__volume" title="Mute/Unmute">
Mute/Unmute Episode
							</button>
							<button data-skip="-10" class="player-btn player-btn__rwd" title="Rewind 10 seconds">
Rewind 10 Seconds
							</button>
							<button data-speed="1" class="player-btn player-btn__speed" title="Playback Speed" aria-label="Playback Speed">1x</button>
							<button data-skip="30" class="player-btn player-btn__fwd" title="Fast Forward 30 seconds">
Fast Forward 30 seconds
							</button>


							<time class="ssp-timer">00:00</time>
/
							<!-- We need actual duration here from the server -->
							<time class="ssp-duration" datetime="PT0H2M21S">2:21</time>


								<nav class="player-panels-nav">
												<button class="subscribe-btn" id="subscribe-btn-19909" title="Subscribe">Subscribe</button>
																		<button class="share-btn" id="share-btn-19909" title="Share">Share</button>
										</nav>
RSS Feed
							<input value="https://dmarcreport.com/feed/podcast/dmarc-report" class="input-rss input-rss-19909" title="RSS Feed URL" readonly />


						<button class="copy-rss copy-rss-19909" title="Copy RSS Feed URL" aria-label="Copy RSS Feed URL"></button>


						Share


						<a href="https://www.facebook.com/sharer/sharer.php?u=https://dmarcreport.com/blog/podcast/setting-spf-dkim-and-dmarc-for-omnisend/&t=Setting SPF, DKIM, and DMARC for Omnisend" target="blank" rel="noopener noreferrer" class="share-icon facebook" title="Share on Facebook">


						</a>
						<a href="https://twitter.com/intent/tweet?text=https://dmarcreport.com/blog/podcast/setting-spf-dkim-and-dmarc-for-omnisend/&url=Setting SPF, DKIM, and DMARC for Omnisend" target="blank" rel="noopener noreferrer" class="share-icon twitter" title="Share on Twitter">


						</a>
						<a href="https://media.mailhop.org/dmarcreport/images/2025/01/Setting-SPF-DKIM-and-DMARC-for-Omnisend.mp3" target="blank" rel="noopener noreferrer" class="share-icon download" title="Download" download>


						</a>


						Link


						<input value="https://dmarcreport.com/blog/podcast/setting-spf-dkim-and-dmarc-for-omnisend/" class="input-link input-link-19909" title="Episode URL" readonly />


					<button class="copy-link copy-link-19909" title="Copy Episode URL" aria-label="Copy Episode URL" readonly=""></button>


						Embed
/*! This file is auto-generated */ ’ title=“Embed Code” class=“input-embed input-embed-19909” readonly/>
<button class="copy-embed copy-embed-19909" title="Copy Embed Code" aria-label="Copy Embed Code"></button>
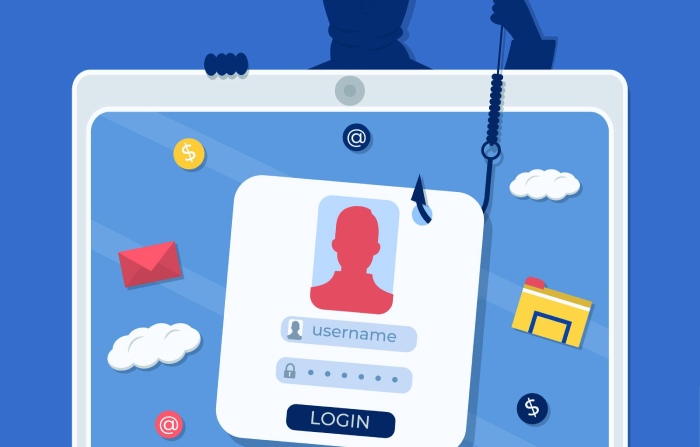
Omnisend users who don’t have SPF, DKIM, and DMARC protocols in place are in for a problem. Their emails are highly likely to be blocked, hindering communication and operations. With these three email authentication protocols in place, users comply with Omnisend’s requirements and keep their brand names out of phishing and spoofing reports.
No matter how frequently you send emails, you must protect your domain and brand image with SPF, DKIM, and DMARC.
How Do You Configure up SPF for Omnisend?
SPF allows you to list down all the servers that are officially authorized to be used for sending emails on your behalf. If any other server than the ones you mentioned in your **SPF record is used for sending emails from your domain, then those emails will fail the SPF checks. They will either land in the spam folders of the recipients or get rejected from entering their mailboxes. This ultimately **prevents the targeted victims from engaging with such malicious emails sent under your name.
Here is how you can start with SPF for Omnisend-
-
Use an online SPF record generator tool to create a TXT record. While you can generate it manually, we don’t recommend this approach as it’s time-consuming and more prone to errors.
-
Authorize Omnisend as a trusted sender by entering ‘mailgun.org’ in the ‘authorize third-party domain’ field of the tool, as Omnisend relies on Mailgun for email delivery.
-
Publish the generated SPF TXT record in your domain’s DNS. To do this, log in to your DNS management console or request that your hosting provider add it for you.
-
Finally, use an SPF lookup tool to verify the accuracy of your SPF record and confirm that Omnisend is listed as an authorized sender.
If you already have an SPF record, here’s how to update it for Omnisend:
-
Use an SPF checker tool to find your current record, such as:
v=spf1 include:_spf.example.net -all. -
Add Mailgun for Omnisend, updating it to:
v=spf1 include:mailgun.org include:_spf.example.net -all. -
Edit the record in your DNS management console and save it.
-
Wait up to 24 hours for the changes to take effect.
How Do You Configure up DKIM for Omnisend?
-
Use your login credentials to log in to your Omnisend account.
-
Go to Store Settings
-
On the Sender Domain page, go to the ‘Your sender domains’ tab and click on ‘+ Add sender domain’ to log in to your domain.
-
Next, enter your domain name.
-
The DKIM record for your domain is on the ‘Domain Authentication’ page. It is a TXT record that consists of the public key and name.

-
Add this record to your domain’s DNS settings.
-
The authentication mechanism will be activated in a maximum of 24 hours.
How Do You Configure up DMARC for Omnisend?
-
Generate a DMARC record using an online tool, starting with the ‘none’ policy before moving to ‘quarantine’ and ‘reject.’
-
Log in to your DNS management console and add the DMARC record.
-
Check its accuracy with an online DMARC lookup tool.
Topics
Content Specialist
Content Specialist at DMARC Report. Writes vendor-specific email authentication guides and troubleshooting walkthroughs.
LinkedIn Profile →Take control of your DMARC reports
Turn raw XML into actionable dashboards. Start free - no credit card required.